By Annie Brooks
From an 1887 manual for schools and families. It moves from the measurements a dressmaker takes, through the room she works in, to the first stitch a beginner is given.
Don't lose this article. Enter your email below, and I'll send it to you right now. Plus a little crochet inspiration from me, straight to your inbox.
The measurements, and the tracer
Measure for waist — Measure for waist as follows: Collar size, length of back, length of front, and length under arm (from waist line), size around hip, waist and bust, width of chest between front armscyes, width of back between armscyes, length of sleeve. All round measures must be taken very snug.
The tracing wheel — The Steel Tracing Wheel is an absolute necessity in dressmaking. It saves time, prevents inaccuracy, and should be used in marking seams on all goods, upon which it will make an impression. Where a steel Tracer cannot be used, the convenient CHALK TRACER is an excellent substitute. Any colored chalk may be used, and the line made by it is very fine and even.
| Measurement | The book’s note |
|---|---|
| Collar size | |
| Length of back | |
| Length of front | |
| Length under arm | from the waist line |
| Size around hip | taken very snug |
| Waist | taken very snug |
| Bust | taken very snug |
| Width of chest | between the front armscyes |
| Width of back | between the armscyes |
| Length of sleeve |
Why the fit matters
As in music, discord offends the educated ear, and has a demoralizing effect on the symphonious aspirations of the uncultivated, so in dress, a badly fitting garment is very offensive to the artistic eye, and detrimental to the growth of the aesthetic sentiment in those whose artistic tastes have not been educated and developed. It is like a weed in the garden of Fashion, marring the beauty of its surroundings, and encouraging the growth of more.
How requisite it is, therefore, to encourage an art, the acquirement of which makes it easy to avoid the defects and imperfections which result from the clumsy though probably labored efforts of the unskilled.
In the “good old days” the women were celebrated for their needlework, but the sewing-machine work has in a great measure superseded hand work, until the latter is almost a lost art. Happily, educators have awakened to the fact that a girl’s education is incomplete without this useful art, and needlework is about to be an important part of every girl’s education.
To become a dressmaker without a thorough knowledge of the rudiments of plain sewing is impossible, hence the necessity of beginning at the foundation, and acquiring the desired knowledge step by step.
In presenting this work to the public, the writer aims to make plain the rules and methods of scientific dressmaking. To give all the various ways of doing each part would require unlimited space, and would only tend to mystify the beginner. Any complicated or difficult methods are to be avoided, while simplicity, accuracy and artistic effect are to be the aim in this study.
In the hands of competent teachers, this work may be made highly useful in schools, since it affords material for a valuable course of lessons in needlework, plain garment making and dressmaking. Every woman should know how to make a dress, that she may dress becomingly and economically. The art of dressmaking must be acquired, the one thousand and one things to be done or left undone must be understood; the whole system of dressmaking, fitting, draping and trimming must be learned before one is in a position to dress economically or artistically.
It is like a weed in the garden of Fashion, marring the beauty of its surroundings, and encouraging the growth of more.
The sewing room
Dressmaking is an art, and a science, the individual the artist, the science consisting in the combined experience of the most successful dressmakers of past and present time. To avail herself of the benefits of science, the seamstress must be a regular subscriber and diligent reader of the best books bearing upon her business. Any new invention, intended to perfect or simplify her work, should be investigated.
The sewing room should contain the best scientific helps to be obtained, and, with a proper attention to her business affairs, success must attend her efforts.
Don't lose this article. Enter your email below, and I'll send it to you right now. Plus a little crochet inspiration from me, straight to your inbox.
The room — Whenever practicable, a sewing room should be devoted to sewing alone. It is especially disagreeable to sew in a dining or a general living room, as many of the conveniences necessary to sewing are not adapted to such a room, and there is also some danger of the work becoming soiled. A smooth ingrain carpet is more easily kept clean than any other, and for that reason should cover the sewing room floor.
Select a light-running sewing machine, which takes a straight and uniform stitch. Keep the machine well oiled, and perfectly clean. A mirror should be placed near the window. The cutting-table should be long and smooth, without leaves, and unvarnished. Mark the scale of inches on table from left to right, corresponding exactly with the tape line.
A small folding table is more convenient than a lap board for basting linings to goods and for trimming skirts. An adjustable dress-figure is a great convenience, saving the time of the sewing girls occupied in the hanging of skirts and in draping. The sewing chairs should be low and comfortable, without arms or rockers.
A stand work basket for spools, a pincushion, a wardrobe for the work, a first-class satteen tape line, steel tracing wheel, chalk tracer, scissors, yard stick, bent shears for cutting, pencils, measure-book, a bag or box for waste, a quire of drafting-paper, and a piece of stout cloth tacked to the wall, to which to pin sleeves, collars, cuffs, and any small parts of work, until they are wanted, a smoothing-iron, and last but not least, a perfect system of dress-cutting.
A system of cutting — The primitive and inaccurate methods which have so long held sway are not equal to the occasion. The system, (on which depends the success or failure of the dressmaker), must be a method of measurement, accurately applied to the garment to be cut. The Mrs. Ross’ Tailor system is a system of mathematical calculation, so arranged and simplified as to be readily comprehended by any girl or woman of ordinary ability.
This system is fully explained on page 3 of cover, and should be used in every manual training-school, and sewing room. The benefits to be derived from an invention of this kind are readily perceived, as no refitting is required. We give on page 27. directions for cutting and fitting by purchased pattern, and, as compared with cutting correctly, without difficulty, or changing, offers a decided contrast.
Clean hands, a thimble, and the first seam
Success in most things depends on trifles. No work can give satisfaction, that is not done with very clean hands. Indeed, if they are dirty, the task is made more difficult, as they are generally moist also, and the needle passes through the material with greater difficulty. No one should attempt any work without a thimble.
It cannot be done satisfactorily without one, and there is danger of injury to the finger. To break or bite off the thread is a common fault, which should be at once corrected. Always cut the thread with a small pair of scissors, kept in the apron pocket or other convenient place.
Having learned to hold the needle in the left hand, and to thread and to work it with the right hand, put the thimble on the middle finger of the right hand. The thread should be rather finer than the thread of the cloth, and never more than from sixteen to twenty inches long. Sewing or seaming means joining two edges together.
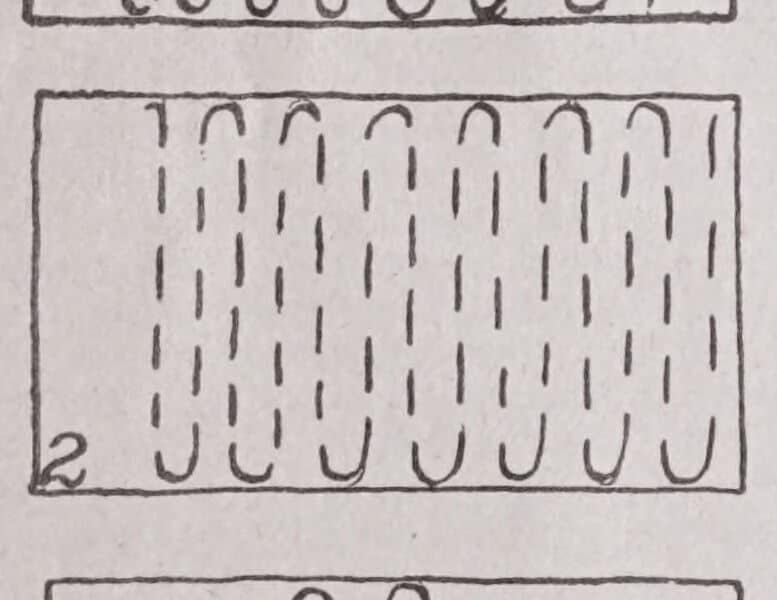
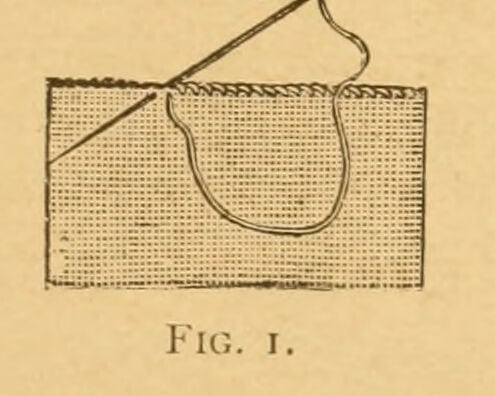
Sewing over and over, or overhand seam, is chiefly used in joining two selvedges. Lay the edges of the material to be joined together, and set the needle regularly from the back to the front through both materials, taking up either one or two threads. Draw the thread tight, but do not pucker the seam, and repeat the stitches at regular distances of one or two threads, as shown in Fig. 1. Having completed the seam, smooth it out, so that it will lie perfectly flat.
Source
Mrs. H. A. Ross, Studies in Plain Needlework and Amateur Dressmaking, 1887. Public domain. Internet Archive studiesinplainne00ross.
Reproduced verbatim. This is the author’s own book and it advertises her own products; one sentence of advertising copy for the publisher’s tracing wheels has been left out, and the plug for “the Mrs. Ross’ Tailor system” is left standing where it appears. Obvious scanning errors have been mechanically corrected, and a sentence the scanner dropped at the head of the seaming lesson has been restored from the printed page. The engraving is the book’s own.