By Annie Brooks
Smocking begins with a grid of chalk dots and a row of gathering threads, each wound round its own pin. Everything after that is a question of which pleats you sew together, and whether the needle comes out above the stitch or below it.
Don't lose this article. Enter your email below, and I'll send it to you right now. Plus a little crochet inspiration from me, straight to your inbox.
Gathering the pleats
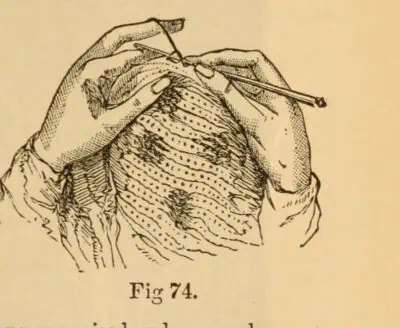
Gathering the pleats — A small box containing a dozen coloured chalks suitable for this purpose can be obtained at any stationer’s or fancy shop for two or three pence. Thread a long needle with a piece of cotton. Make a good knot at the end of it and proceed with the gathering. In each of the spaces between the dots make a complete stitch; when the line of gathering goes the whole way across, the thread should cover the row of dots.
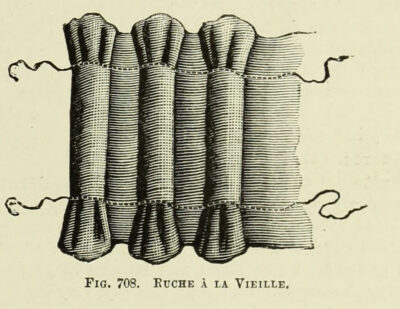
When all the rows are gathered, draw up each thread and wind it round a small pin stuck into the material to keep the pleats drawn together. There should be a separate pin for each gathering thread, or the These gathering threads are afterwards
A point which must be attended to is that in going from one place to another you must always take your stitch lengthwise, never across, or you will spoil the elasticity of the work.
Honeycomb, and honeycomb with diamonds
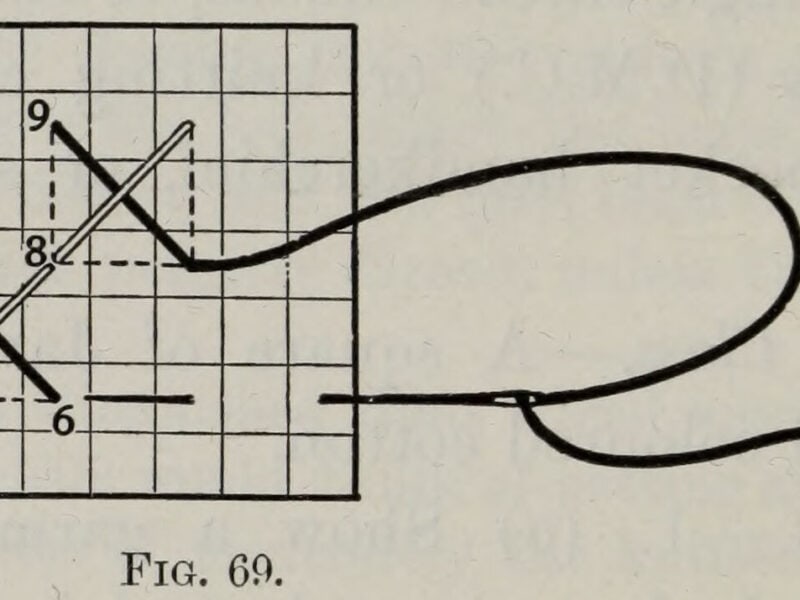
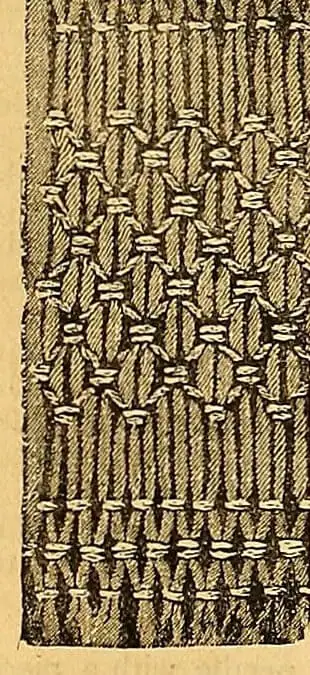
Honeycomb pattern — To work honeycomb pattern commence (with silk of whatever colour you fancy) at the left hand top corner; put your needle through from the back to the front of the first pleat exactly over the gathering thread, draw it out, and put it in crosswise, pointing from right to left through the 2nd and 1st pleats, drawing them close.
Sew them over once or several times more, according to the size of the dot you wish to work. Now insert your needle into the dot you have just worked, taking care that it goes into the 2nd pleat, and draw it out in the same pleat at the next gathering thread; then insert it crosswise into the 3rd and 2nd pleats and sew over as before.
A point which must be attended to is that in going from one place to another you must always take your stitch lengthwise, never across, or you will spoil the elasticity of the work. Perhaps the following plan will help to illustrate what I mean, and make all the patterns more easily understood. Start by putting your needle through from back to front of A 1, sew A 1 and A 2 together, pass the needle from A 2 to B 2, sew B 2 and B 3 together.
Insert the needle at B 3 and bring it out at A 3. Sew A 3 and A 4 together, bring the needle down from A 4 to B 4, sew B 4 and B 5 together. Go on in this way, alternately sewing B’s and A’s until you finish those 2 gatherings. Start again from C 1, sewing it and C 2 together, pass the needle down to D 2, sewing it and D 3 together, pass the needle up to C 3 and sew it and C 4 together, and so on till you have your piece of smocking completed.
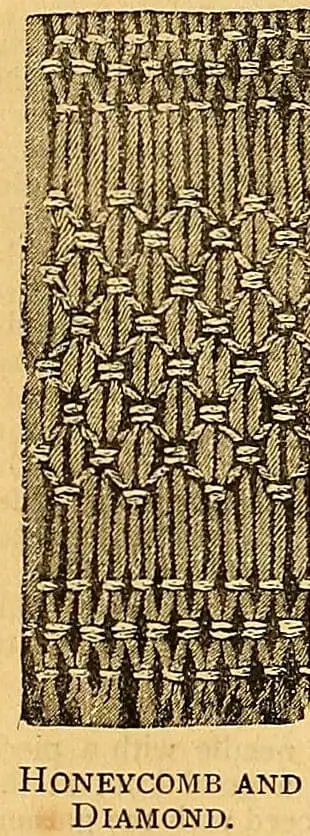
Honeycomb and diamond — In the honeycomb and diamond pattern as represented in the illustration, 16 gatherings are necessary; the 3 above and 3 below are worked almost the same as the honeycomb pattern just described, but the part worked on the 8 centre gathermg? is somewhat different. In it the thread is not passed, as in the honeycomb pattern, at the back of the work, but is passed on the right side, and thus forms part of the pattern.
Insert the needle, as in the honeycomb pattern, into A 1, make a crosswise stitch from right to left in A 2, letting the needle come out below the thread, draw the 2 pleats close, pass to B 3 and take a stitch right to left of it, bringing the needle out below the stitch, then to B 4, bringing the needle out above the stitch; draw these 2 pleats together.
Pass to A 5, making a stitch into it, bringing the needle out above, make a stitch into A 6, bringing the needle out below the stitch; draw the 2 pleats close. Pass to B 7 and make a HoMwrnAiT,.ATr, ®”’,’^’^’ ‘^’^'”Sing the needle out below it, then n^™n make a stitch into B 8, bringing the needle out gatherings.
Start again from C 1, make a stitch from right to left of C 2, bring out the needle above the stitch, draw the pleats close. Pass to B 3 and make a stitch, bringing the needle out above, then make a stitch into B 4, bringing the needle out below it, draw the pleats close.
Don't lose this article. Enter your email below, and I'll send it to you right now. Plus a little crochet inspiration from me, straight to your inbox.
Pass to C 5 and C 6, working as before, and so on until you come to the end of the gatherings. Make the next start again from C 1, but this time pass from C 1 and C 2 to D 3 and D 4, and work along these 2 gatherings. Continue the pattern in this way till you complete the required depth. It is well to put an additional stitch in each point on
| Pattern | Gatherings needed | Where the thread runs | Needle comes out |
|---|---|---|---|
| Honeycomb | At the back of the work | ||
| Honeycomb and diamond | 16 | On the right side, forming part of the pattern | Below, then above, alternately |
| Rope, on the 1st, 4th and 7th gatherings | Always below the stitch | ||
| Rope, on the 2nd, 3rd, 5th and 6th gatherings | Above on every second stitch | ||
| Basket | Below, then above, alternately | ||
| Diamond | |||
| Lattice | 8 |
Rope and basket
Rope pattern — The rope pattern is a very useful one, and the 2 stitches given in the illustration often make nice headings to more elaborate patterns. The bars on the 1st, 4th and 7th gatherings are very simply done. Work along each gathering thread, picking up the pleats one by one with a crosswise stitch, and always bringing out the needle below the stitch.
Those who work crewel work will perhaps more easily understand what I mean if I say that to some extent it resembles outline stitch. The bars on the 2nd, 3rd, 5th and 6th gatherings look more complicated, but are in reality quite as simple., They are done in the same way as those just described, only that in every second stitch the needle is taken out above the stitch instead of below it.
Basket pattern — The basket pattern is done thus — Commence at A I. Sew it and A 2 together; make a stitch crosswise through A 2 from right to left, bringing out the needle below the stitch. Sew A 2 and A 3 together once; make a crosswise stitch through A 3, bringing the needle out above the stitch.
Sew together once A 3 and A 4, then make a stitch through A 4, bringing out the needle below the stitch. Continue thus to the end of the gathering. The thick bar of work at the top of the illustration is made by working 5 rows of this close together. The thin bars in the centre are made by single rows of it.
To work the lower part in the engraving, work 2 rows of the above close together, and then instead of working from left to right in straight lines, work in diagonal lines downwards from right to left, finishing off with a row of rope stitch.
Diamonds and lattice
Diamond patterns — The two diamond patterns given in the engravings are both done on exactly the same plan, only one is deeper and has a greater number of gatherings than the other. Before working the diamonds do the rope stitches above and below, as these will steady the pleats and make them easier to work upon.
Then start from A I. Insert the needle in a slanting direction downwards from right to left of A 2; insert the needle then into pleat 3 in the same way, starting on the same level at which it came out in pleat 2. Repeat this in pleat 4; the needle should in this pleat come out exactly on gathering B. Now make a stitch into B 5, slanting the needle upwards instead of downwards, make stitches, slanting the needle upwards, into pleats 6, 7 and 8. At pleat 8 the needle should come out on gathering A. Proceed in this
Lattice pattern — The lattice pattern is worked something like herringboning. To work a piece the depth shown in the illustration 8 gatherings are necessary. Work rope stitch across gatherings A and H. Then start by inserting the needle from back to front of B 1. Take a crosswise stitch through C 3 and C 2, pass up to the B line and take a stitch through B 4 and B 3, then down again to C 5 and C 4.
Pass up to B 6 and B 5, and so on to the end of the 2 gatherings. Next work in the same manner gatherings D and E, and then gatherings F and G.
Source
Mrs Leach’s Fancy Work Basket. Public domain. Internet Archive mrsleachsfancywo00leac.
Reproduced verbatim from the scanned original. Obvious scan errors (broken letters, words split across a line) have been mechanically corrected; nothing has been rewritten or modernised. One line in the honeycomb-and-diamond instructions is destroyed where an engraving’s caption collided with the text in the scan; it is left as printed. The engravings’ captions also fall out of order in this column.