Table of Contents
- 1 Prep
- 2 Crochet Hooks
- 3 Stitches
- 4 Misc
- 5 Materials: What Do You Need to Be Able To Crochet?
- 6 Choosing The Right Yarn
- 7 Choosing The Right Crochet Hook
- 8 How to Hold Your Crochet Hook
- 9 Pencil Hold for Crochet Hook
- 10 Knife Hold For Crochet Hook
- 11 Crocheting In Rounds vs. Rows
- 12 Begin Every Project with a Slip Knot
- 13 How to Crochet a Chain
- 14 The First Stitch to Learn: Single Crochet
- 15 The Basics of the Single Crochet Stitch
- 16 Working Single Crochet Across a Row
- 17 Adding Rows of Single Crochet
- 18 A common mistake
- 19 Additional Basic Crochet Stitches
- 20 Half Double Crochet
- 21 Double Crochet
- 22 Treble Crochet
- 23 Your First Crochet Projects
- 24 NEXT STEPS
- 25 Learn NEW Stitch Patterns
- 26 Increasing and Decreasing
- 27 Advanced Stitches
- 28 Working In Front and Back Loop Only
Prep
Crochet Hooks
Stitches
- ROUNDS VS. ROWS
- SLIPKNOT
- CHAIN
- SINGLE CROCHET
- HALF DOUBLE CROCHET
- DOUBLE CROCHET
- TREBLE CROCHET
- ADVANCED STITCHES
Misc
- INCREASING AND DECREASING
- WORKING AROUND POSTS
- WORKING IN FRONT AND BACK LOOP ONLY
- LEARN HOW TO READ CROCHET PATTERNS
One of the best things about the craft of crochet is that you don’t need to learn very much at all in order to be able to make beautiful things, and yet there is also always something new that you can learn in crochet. Learning just a tiny bit about materials and the basic single crochet stitch, you will easily be able to make items including scarves and blankets. As you learn even more about materials, different stitches, varied techniques, and reading patterns, you will be able to truly get creative with the items that you make. This guide will teach you the basics of crochet, including a few common stitches, and includes tips to point you in the right direction of areas for more learning in the future.
Don't lose this article. Enter your email below, and I'll send it to you right now. Plus a little crochet inspiration from me, straight to your inbox.
A couple of notes before we begin … These instructions are written for right-handed crocheters. They will tell the basics to left-handed crocheters who will reverse the directions when doing their own work. Also, the terms used in this article (such as “single crochet” and “double crochet” refer to the American crochet terms. Some crochet patterns use British crochet terms, which can get confusing because a “double crochet” in American terms is the same as a “single crochet” in British terms. You can typically assume that a pattern is written in American terms unless told otherwise.
Materials: What Do You Need to Be Able To Crochet?

A favorite thing about crochet is that it doesn’t require a big investment in a lot of materials to get started. All that you need is yarn and a crochet hook. (Tip: you can use fibers other than yarn and you can actually crochet with your fingers, but it’s best to learn the basics first.)
Choosing The Right Yarn

What kind of yarn should you buy? If you happen to already have yarn at home that you want to work with then it’s totally fine to just try using what you have. That said, there are some types of yarn that are easier for learning to crochet. If you are going to the store to purchase yarn, here are some things that you should look for:
- A solid color in a light shade. Yarn that changes color throughout (often called variegated yarn) as well as yarn that is dark in color will be harder for you when learning because it’s not as easy to see where your stitches should go.

- Yarn that is very smooth when you look at it. These days there are all types of fibers that you can use and there are novelty yarns that have bumps and different textures on them. These can all be great for crochet but when you first learn the craft you’ll want to choose yarn that looks plain in terms of texture. You will find this yarn in many fibers but the most common choices are going to be wool, cotton and acrylic. People can learn on any of these, so find what works for you, but it may be nice to start with cotton because it frequently has the best stitch definition. (Stitch definition just means that you can easily see each shape of your crochet stitches. Seeing them clearly makes learning about them easier.) A very smooth acrylic is another good choice and one that is very affordable.
- Yarn in a medium weight. You can find very thin yarn (and even thread) as well as very bulky yarn; all different yarn weights have different effects and a purpose in crochet. It is easiest to learn with a medium average-weight yarn when just starting.

Tip: Take the time to learn how to read a yarn label. There is a lot of very useful information on this label and they are fairly uniform so that learning about one will teach you about all of the yarn you might want to purchase. To start, you especially want to look for the number on the yarn, which tells you the weight; a worsted weight yarn is size 4. You can see that clearly indicated in the box on the left side of the yarn label above.
Choosing The Right Crochet Hook

Again, if you already happen to have a crochet hook in your stash and you don’t want to invest in new materials, it’s fine to try learning with what you have. Most of the time you can make the yarn you have work with the hook that you have. But if you have to buy a new hook anyway, or you are having difficulty learning with the hook that you have, there are some good things to know about purchasing your first crochet hook.
- Select a hook size that goes with your yarn. In some cases, this information will actually be on the yarn label. Alternatively you can check this online. Technically you can use any yarn with any hook size but you will get dramatically different effects and it will be more difficult as a beginner to use hooks sized to yarn other than what you are using. If you have selected a medium, worsted weight yarn, consider trying a size H crochet hook. Tip: Your yarn label often tells you which hook is the best for that yarn. In the yarn label shown above, next to the number 4 that indicated yarn weight, you’ll see it suggests a size I crochet hook. Note that hook sizes in America use letters like this, as well as mm numbers that correspond to those letters.
- Select a hook size that feels comfortable to work with. Hopefully the recommended hook size for your yarn will feel right but you can go up or down a size if it’s not working for you. In other words, you may have chosen a size H hook to work with your worsted weight yarn but you could instead select a size G or size I crochet hook for that same yarn.
- Important note on sizing: There are very tiny crochet hooks that are used for thread crochet. The sizing on these is different from regular yarn crochet hooks, so get more info before proceeding to use those. In the photo of crochet hooks above, you will see the thread crochet hooks in silver on the let and the typical yarn crochet hooks on the right.

- Crochet hook heads. There are two different types of “heads” common to a crochet hook: inline vs. tapered. You might find it beneficial to learn more about each type down the line but to start just know that the inline tends to be pointier, flatter and deeper than the tapered design. In the photo above, inline is on the left, tapered on the right. Either one can work for you, so all that you should know right now is that if you are having a lot of trouble learning to crochet, it might be worth it to try the other kind of hook than the one you’ve been using.
- Crochet hook handles. There is a lot of variety in hook handles, including the materials they are made from (aluminum and plastic are common but wood, bamboo, acrylic, and glass are some of the other options). Most crochet hooks have a thumb grip, which will make crocheting easier than ones that don’t. There are also ergonomic handles for people who get hand pain from crocheting.
Overall, the best advice is to start simple. Choose a mid-size crochet hook made from aluminum or plastic, be sure it has a thumb rest, and note the type of hook head it has in case you need to try the other kind down the line.
How to Hold Your Crochet Hook
The most important thing to know about holding your crochet hook is that you are going to have to practice to find the way that feels most comfortable to you. The other key thing to know is that there are two basic ways that people hold their hooks, known commonly as “like a pencil” and “like a knife”. As their names suggest, you will hold the hook somewhat similarly to how most people use those two utensils. Let’s take a closer look:
Pencil Hold for Crochet Hook

In the pencil grip, you hold the hook between the thumb and second finger. Your third finger may add additional support or may curl into your fist and not be use to hold the hook.
Knife Hold For Crochet Hook

Start with one of these, see if you can find a variation on it that feels good for you, and if you really can’t get the hang of it then try the other method with your own variations on it. Tip: take the time to actually take a knife out of a drawer and a pencil out of a desk and hold them both to see exactly how you tend to hold these utensils. Apply this to trying out how to hold your hook. Know, too, that what feels awkward when starting is likely to become second nature very quickly.
Crocheting In Rounds vs. Rows
Most crochet projects are worked either in the round or in rows. As the names suggest, crocheting in rounds means you begin with a circle and work out from there – this technique is often used to make hats, circular vests and other round projects. Crocheting in rows means that you work one row, then the next (typically turning the work, which will be discussed below), creating square and rectangular items like scarves and blankets. Items that require shaping, such as shawls, are often still worked in the round but use increases and decreases (which we will also discuss down the line. The important thing to take away right now is that it is typically best to learn how to crochet rows before you tackle rounds, so that is how we are approaching this guide.
Begin Every Project with a Slip Knot
Almost every crochet project is going to begin with a slip knot. (Tip: There are a few variations particularly in regards to specific niche techniques in crochet. One very common example is the magic ring, which is one way of beginning projects worked in the round instead of in rows. However, even with that technique, there are alternatives that begin with a slip knot. Learn this first, learn more later.)

Bring the end of the yarn into a loop so that the loose end crosses over the top of the end that is still attached to your ball of yarn.

Pinch the top of the loop and bring it vertically down until the part where the yarn crossed over itself is in the center of the loop. You will end up with something that looks a lot like a pretzel.

Pinch the center yarn that is running vertically through that “pretzel”. Pull it through.

When you’ve pulled that yarn through, you will end up with a knot and a large loop above it.

Insert your crochet hook from the right to the left through that loop.

Pull on the loose end of the yarn to tighten the loop.

You now have your slip knot and this is how you will begin your crochet project.
How to Crochet a Chain
Likewise, nearly every crochet project that you start will begin by crocheting a chain. Even projects that are worked in the round may often begin with a short chain. Learning how to crochet a chain is your first step towards really starting to learn how to crochet.

Tip: Even if you have gotten comfortable with how you hold your crochet hook, you may find that at this stage it feels awkward learning how to hold the yarn itself. It’s all about the tension that you have in both of your hands as you work. Know that you will get used to it. One way of holding the yarn, between your second and third fingers, is shown above. Check out videos of how other people are holding their yarn to get a feel for other options. Find the ways that work for you. There is no right or wrong way to hold either your crochet hook or the yarn.
Yarn over.
You are going to hear this term a lot in crochet so it’s best to learn it now. The term “yarn over” literally means to bring the working yarn (the part attached to the ball of yarn) over the top of your crochet hook, grasping it with the head of your hook. You may sometimes see it abbreviated “yo”. Here is what that looks like:

Bring the yarn that is still attached to the ball of yarn underneath the bottom of the crochet hook.

Bring it over the top of the crochet hook.

Bring it up underneath the head of the hook to grasp it.
pull through.
This is another crochet phrase that you will become very familiar with: pull through. This means that you take the yarn that you’ve hooked onto your crochet hook and pull it through the loop by bringing the hook from the back of the work to the front. You are bringing that “yarn over” back through the same place where you initially inserted the hook. Here is what that looks like:

Pull the hook to the right, towards the loop.

Keep pulling the hook until the “yarn over” and hook head have come complete through the loop. That’s your “yarn over” and “pull through” and it’s also your first chain.

Repeat the yarn over and pull through to keep making your chain longer. This is called your starting chain.
The First Stitch to Learn: Single Crochet

Tip: We are going to share how to work a single crochet stitch first, because it is the shortest basic stitch in crochet and the one that many people begin with. However, because it is short, it can sometimes be hard to tell exactly where to put your hook when working rows of single crochet. If you find that you are having problems, your best bet is to skip down below and try mastering one of the other basic crochet stitches first, with the recommendation that you try double crochet.
The Basics of the Single Crochet Stitch
First we will break down the steps of making one single crochet stitch. In crochet, you work one stitch, then next to it you will work the next stitch, so it can be helpful to see what just one individual stitch looks like. Here is how to single crochet:
Insert your hook into the chain.
As you begin to crochet in rows and work with other stitches, it is going to matter specifically where you insert the hook. But for now, just to get started, let’s not worry about it. Just know that you are going to insert the hook through a stitch by pushing it through the stitch from the front of the work to the back.
We are going to insert the hook into the second stitch from the hook. Trust us on why at this point and we’ll explain more later but know that this is what you will always do when starting a row of single crochet worked into your starting chain.

Notice that you insert the hook through the work, from front to back, and that when you do there will be two loops sitting on top of the hook (and one strand of yarn beneath). If there are not two loops on top of the hook, you’ve inserted it into the wrong part of the stitch. Pull the hook back out and try again!
Yarn over.
You learned how to do this when you learned how to crochet a chain. It’s the same process again.

pull through.
Just like with the starting chain, you are going to “pull through”.

Yarn over and pull through both loops on hook.
With the single crochet stitch, you should now see two loops on your hook. You are going to yarn over again, and you are going to “pull through” again but this time you are going to pull all the way through both of the loops on the hook. Here is what that looks like:

Yarn over.

Pull through both loops on hook.
And once you have done these steps you have completed your very first single crochet. You now know the single crochet stitch, although there are a few helpful things to add to your knowledge.
Working Single Crochet Across a Row
After creating your first single crochet stitch, you are going to work across the entire row of the chain that you created to make a whole row of single crochet stitches. You will repeat the steps above in each stitch of that starting chain, one after the other, until you reach the final stitch at the left side. (Remember: These instructions are for right-handed crocheters; it is reversed if you are left-handed.)
So, to recap, you will “yarn over, insert hook into next stitch, yarn over, pull through, yarn over and pull through both loops on hook” and that’s your next single crochet. Do that all the way across the row.

Adding Rows of Single Crochet
When you get to the end of the row, you need to create what is called a turning chain. The turning chain is made in the same way as the starting chain. The length of the turning chain is determined by the type of crochet stitch that you are using. In single crochet, it is a single chain. So you are going to “chain one” at the end of the row.

Don't lose this article. Enter your email below, and I'll send it to you right now. Plus a little crochet inspiration from me, straight to your inbox.
After making your turning chain, you will turn the work to begin your next row. Note: Now that you know about the turning chain, you might have a sense of why we inserted the hook for the first single crochet stitch into the second chain from the hook. The first chain, which we skipped, effectively counts as the first single crochet of that row. When working taller stitches (see below), we will skip more chains at the beginning and there will be longer turning chains for each row.

Turning the work simply means that you take the left side, where the turning chain is, and flip the entire piece horizontally so that it becomes the right side to begin the new row. You will always work your crochet stitches from right to left, turn the work, and work from right to left again.
You will proceed to make single crochet stitches in every stitch across the row. Let’s review the anatomy of the single crochet stitch so that you can see where to insert your crochet hook as you make each stitch. You will be able to see that there are two loops, and you want to insert the hook so that those two loops sit on top of the loop. Take a look:

Proceed across the row.


To add additional rows, add your turning chain, turn the work and repeat single crochet stitches across the row.

Tip: When you work the first row, make sure that you count the number of single crochet stitches that you make across the row. If you have a long row, it can help to use stitch markers, which are little tools that you place every five or ten stitches to help you keep track. You want to know how many single crochet stitches are in the first row because you want to have the same number in every subsequent row to keep the square or rectangular shape of the item that you are making. So if you have ten single crochet stitches in row 1, you want to have ten in row 2 as well. This is where that “turning chain” becomes important. That chain counts as the first single crochet of the row. You will make your second single crochet in the stitch next to it (not in the first stitch of the row that sits underneath it.) When you get to the end of that row, you should have the same number of stitches as the previous row, including the turning chain as one of those stitches. So, if you have ten single crochet stitches in the first row, you will crochet your turning chain and this counts as the first one, then you crochet nine more single crochet stitches across the row for a total of ten in that row. Repeat across all rows.
A common mistake

In regards to the tip above, it is not at all uncommon for your count to be wrong, which will give you a lopsided shape instead of a square. What typically happens is that people aren’t quite sure where to insert their hooks, so they add stitches or don’t have enough stitches in a row. That’s why it is important to keep track in each row. The most common mistake is to add an extra stitch at the start of the row; always remember that you begin in the second stitch, because the turning chain counts as the first stitch. The other common mistake is forgetting to add the final stitch; sometimes it’s hard to see that one and you forget it. Keep count, use stitch markers if you need to, and go back and re-work things as soon as you see that a mistake has been made.
Fun fact: You can easily rip back your work in crochet, meaning that you just remove your hook, pull on the yarn and let it unravel to the point where you are ready to re-start the work again. In crochet, this is often called “frogging”, a term said to come from the sound of “rip it, rip it” being similar to “ribbit, ribbit”.
Additional Basic Crochet Stitches
There are a bunch of basic crochet stitches that are built off of the same basic idea as the single crochet stitch. Remember the “yarn over” from single crochet? You basically add more “yarn overs” to get similar crochet stitches of different heights. Let’s take a look.
Half Double Crochet

Tip: We include this crochet stitch under the basics because it is a frequently-used stitch that is worthwhile for a beginner to learn. That said, it is shaped a little bit differently than the other basic crochet stitches; it has a “third loop” that you likely won’t want to learn about until you have more crochet experience. We recommend learning single, double and treble crochet first then coming back to this stitch.
The Basics of the Half Double Crochet Stitch
The half double crochet stitch, which is abbreviated hdc, is worked almost exactly the same as the single crochet stitch except that you begin with an extra “yarn over” and this adds a little more height to this stitch in comparison with single crochet. Here’s how the half double crochet is worked:
Yarn over.

Unlike single crochet, you start with a yarn over.
Insert hook into stitch.

You are going to insert your hook into the third stitch from the hook. (The first two chains that you skip here effectively count as the first half double crochet of the row, which you will see reflected later when you make a turning chain.)
Yarn over and pull through.
There should now be three loops on your hook. Remember that in single crochet, there were only two. The extra one comes from that first yarn over you did when beginning this stitch.
Yarn over and pull through all three loops on hook.

Working Rows of Half Double Crochet
You will continue making half double crochet stitches across the row. When you get to the end, you will chain two for the turning chain. Remember: the length of your turning chain is determined by the height of your crochet stitches. You would chain 1 for single crochet but you chain 2 for half double crochet. Turn the work and repeat half double crochet stitches across the new row, always counting to make sure that you have the same number of stitches in one row as in all of the other rows.


Double Crochet

The double crochet stitch is one of the most common crochet stitches. It is used to make a diverse range of patterns and is the primary stitch in the classic crochet granny square, a motif in crochet that most people are familiar with. The double crochet is abbreviated “dc”.
The Basics of the Double Crochet Stitch
Like half double crochet, double crochet is similar to single crochet except that it begins with a yarn over. What makes it different from half double crochet is another yarn over down the line, making it even taller than the half double crochet stitch. (As you might have noticed, the half double crochet is halfway between the height of single crochet and double crochet.) Let’s look at how the double crochet stitch is made:
Yarn over.
This part should be pretty familiar by now.
Insert hook into stitch.

Insert the hook into the fourth chain from hook. This counts as your first double crochet of the row, following the pattern we’ve discussed in single crochet and half double crochet.
Yarn over and pull through.
Again, this should be pretty familiar. At this point, you’ve done the same things that you did with half double crochet and should have three loops on your hook, but this is where the stitch gets different.
Yarn over and pull through two loops on hook.

With half double crochet, you would now yarn over and pull through all three loops on the hook and be done with the stitch. With double crochet, you will only pull through the first two loops on the hook. This leaves one loop still on the hook.
Yarn over and pull through remaining two loops on hook.


(There was one loop at the end of the last step and by doing the “yarn over” you create the second one.)
Working RowS oF Double Crochet
You will work double crochet stitches across the row. When you get to the end of the row, chain 3 for your turning chain. Turn your work. Beginning in the second stitch (because the turning chain counts as the first stitch of the row), work double crochet stitches in each stitch across the row.


Treble Crochet
The treble crochet is taller than the double crochet. It is sometimes called the “triple crochet” instead of treble crochet and is abbreviated “tr”.
The Basics of the Treble Crochet Stitch

The treble crochet stitch is worked almost exactly the same as the double crochet stitch, except that it has an additional yarn over at the beginning which gives it extra height. You should be starting to feel confident in crochet by now and can tackle this fun stitch. Here are the steps:
Yarn over twice.

Insert hook into chain.

You will insert the hook into the fifth chain from the hook.
Yarn over and pull through.

Yarn over and pull through first two loops on hook.

Yarn over and pull through first two loops on hook.

Up until this point, you’ve basically followed the steps of double crochet, but because you added an extra yarn over at the start, you still have loops on your hook. So one more time:
Yarn over and pull through Both loops on hook.

And that’s your treble crochet stitch.
Working Rows Of Treble Crochet
As you now realize, you will work treble crochet stitches in each stitch across the row. When you get to the end of the row, chain 4 for your turning chain, then turn the work to begin the new row. Your chain 4 counts as the first treble crochet of the new row.


Tip: You can keep going taller and taller than treble crochet using the same basic approach. A “double treble” begins with three yarn-overs instead of two, a “triple treble” with four, etc. However, because of the tension of trying to hold so much yarn on the hook, these taller stitches are more awkward to master and you don’t see them used very often.
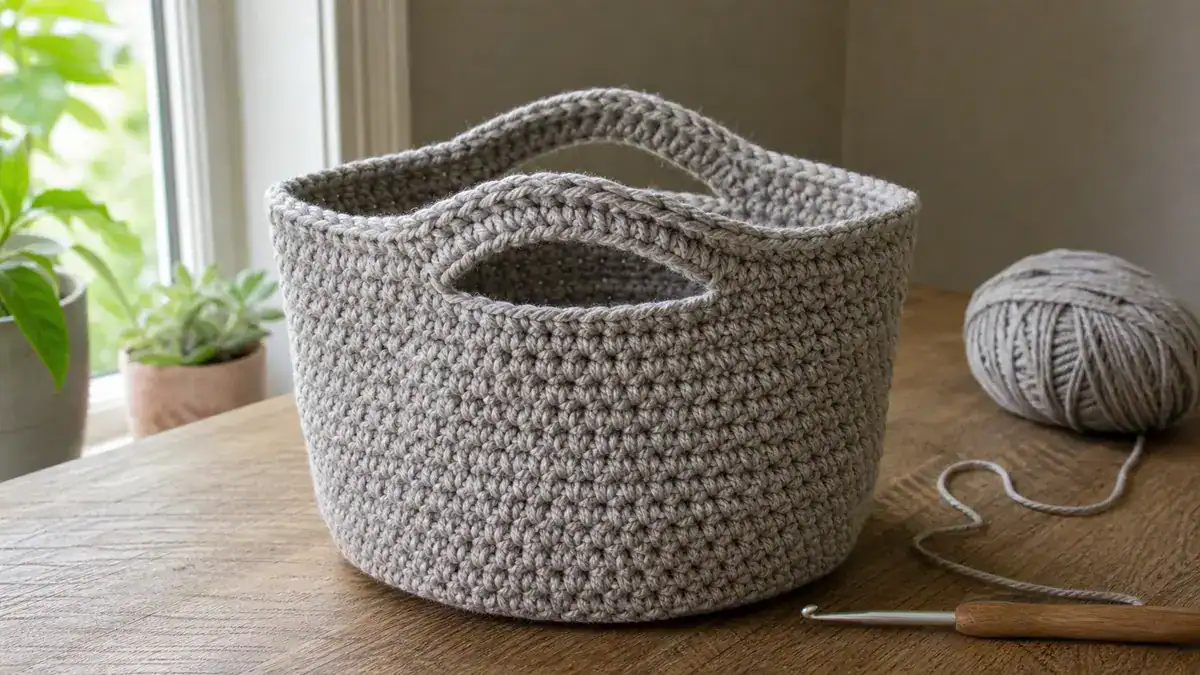
Your First Crochet Projects
Once you have gotten a little bit familiar with your materials and learned the slip knot, chain and at least one basic crochet stitch, you can actually make a lot of items. Anything that you can think of that is square or rectangular is fair game and also great practice for learning these stitches.
All that you need to do is:
- Pick a project. Let’s say you want to make a washcloth or a scarf.
- Crochet a chain that is the approximate width of the project you want to make, perhaps slightly longer.
- Select your stitch (single crochet or double crochet, for example). Work your first stitch into the correct part of the chain. For example, if you are using double crochet, work your first double crochet into the third chain from the hook. Then work double crochet stitches into each chain all the way across to the end.
- Crochet a turning chain. (Make sure that the length of the turning chain corresponds with your chosen stitch; so if you are working in double crochet, you will chain 3 for the turning chain.) Turn the work. Double crochet into each stitch across the row.
- Repeat previous step until the item is as long as you want it to be; square for a washcloth or very long for a scarf.
Keep practicing!
Tip: Once you have made quite a few projects, each of which all use the same crochet stitch (several single crochet washcloths, several double crochet scarves, etc.) then you can expand your skills by working with different stitches in the same project. Do a row of single crochet then a row of double crochet then a row of treble crochet and repeat, for example. Make sure the turning chain at the end of each row corresponds to the height of the stitches that you will use in the next row (a turning chain of three if you are about to begin a row of double crochet) and that the height of all of the stitches is the same within one row (double crochet across the whole row.)
NEXT STEPS
Now you know the basics of crochet! Here are some next steps for things that you might want to learn after mastering these basics. We won’t go into the details of any of these at this time but this should point you in a good direction for what to search for in classes, books, and tutorials to take your crochet to the next level.
Learn NEW Stitch Patterns
So far what you have learned are specific individual stitches. From there, you can learn stitch patterns, which use combinations of different stitches. Some good ones to start with, because they build upon the basic crochet stitches shown above, include:
Increasing and Decreasing

You can increase and decrease in crochet using the basic stitches as a way to give shape to an item. With basic stitches only, you could make a rectangular crochet shawl. Once you learn increasing and decreasing, you will be able to make triangular shawls, circular shawls, half circle shawls, and shawls in other shapes, because you know how to make rows narrower or wider than one another.
Advanced Stitches
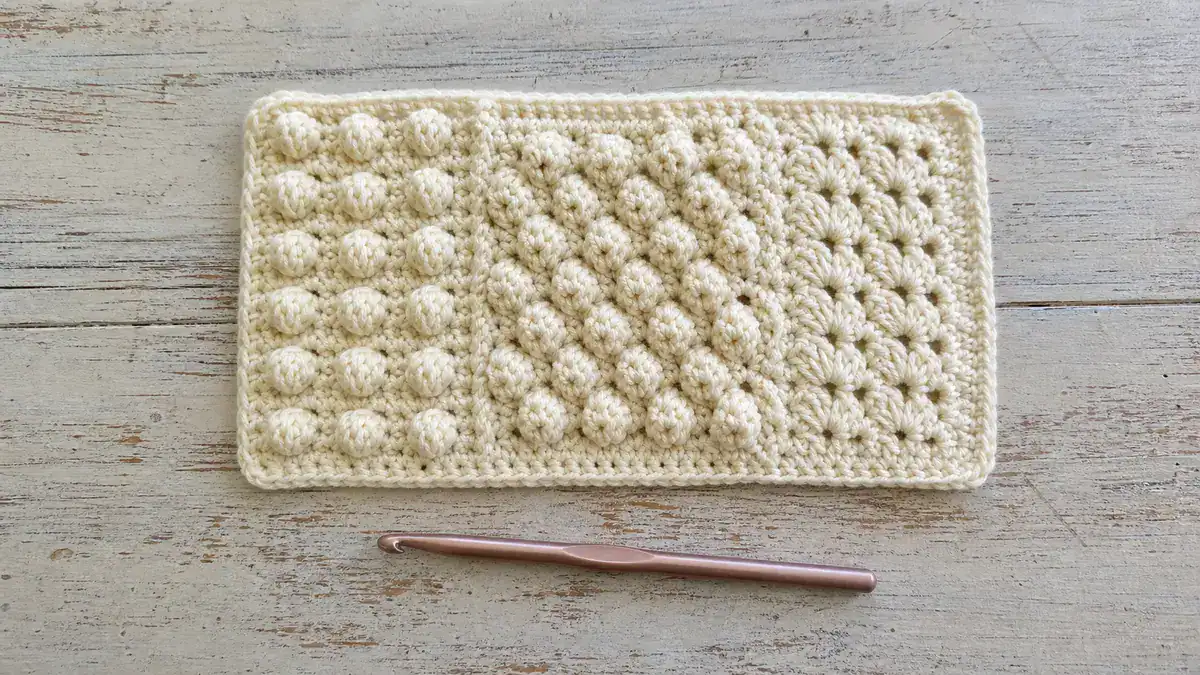
Once you have learned increasing and decreasing, you actually already have the skills you need to learn some of the advanced stitches in crochet. In particular, you know what you need to learn cluster stitches. These are just one of several similar textured stitches that also include bobble stitch, puff stitch, popcorn stitch, and bullion stitch. These are each different types of stitches that you will be prepared to learn after mastering the basic stitches and simple decreasing.
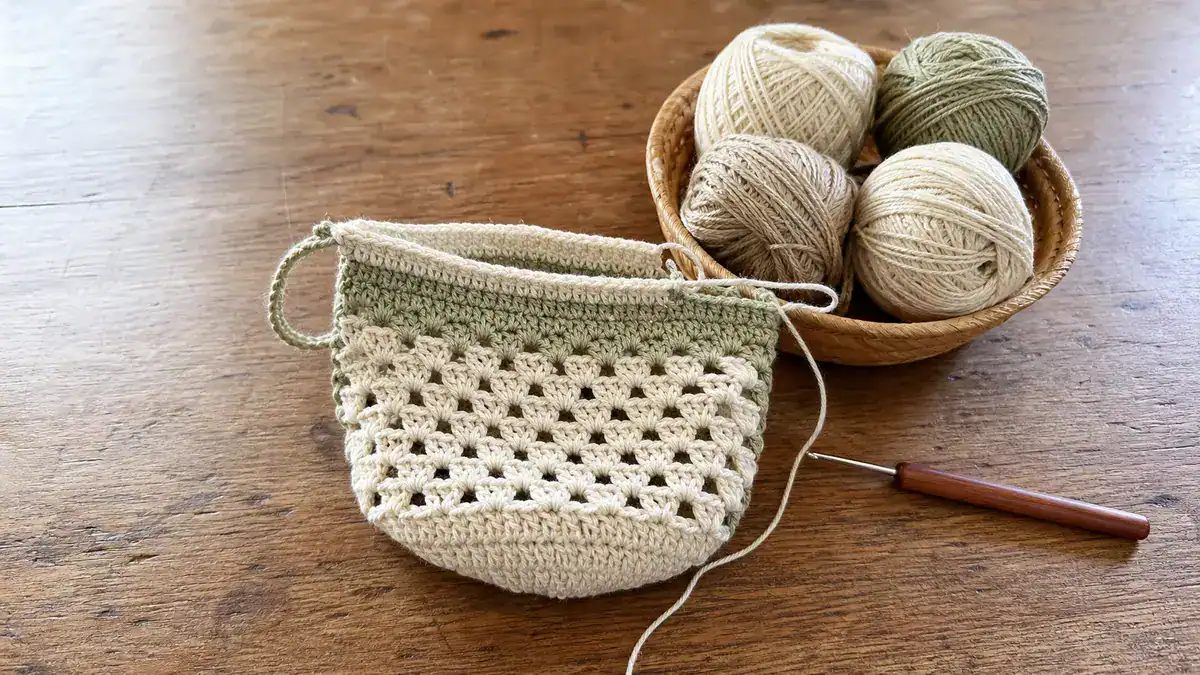
How to Crochet In The Round

Crocheting in the round is done using the same basic stitches that you have already learned. The way that a project starts is different, and you have to use strategic increasing in order to make a project grow the right way when worked in the round. If you’ve already learned some basic crochet stitches and how to increase then you are ready to learn how to crochet in the round. Tip: One of the most classic crochet motifs is the granny square and although it is a square it is actually worked in the round. A granny square tutorial can be a great starting point for first learning to work in the round. It is based on double crochet stitches.
Working In Front and Back Loop Only

When you are first beginning to crochet, you are asked to insert your hook into “both loops” of the crochet stitch. This makes things easier when you are just beginning to crochet but what you’ll come to find out is that you can actually opt to work in the front loop only or back loop only of any of these different stitches. Each option gives you different results; the techniques are used to create texture, ribbing, density and more.
Tip: Half double crochet actually has a third loop that you can learn about. Working in it creates a knit-like texture. Practice first working in front loop only and back loop only of single and double crochet then expand to learn about this third loop in half double crochet.
Working Around Posts

Whether you work in both loops or just one, you are always working into the loops of a stitch, right? Well, yes, except when you expand your skills and learn that you can also work around the post of a stitch. Post stitches are perfect for adding texture to a project. Basketweave stitch and crochet cables are two popular techniques that rely on post stitches. You will discover as you learn more that you can work post stitches in different basic stitches (double crochet post stitches are common as are treble crochet post stitches). You’ll also learn that you can work around the front or back of the post; FPDC stands for front post double crochet, meaning double crochet worked around the front of the post. This might all sound overwhelming as a beginner but what you can be confident in is that if you work through the basic steps of learning how to double crochet then eventually it will become much easier to understand advanced techniques like this!
Learn How to Read Crochet Patterns
You can go your whole life making crochet items using the basic stitches and you will never need to read a crochet pattern. However, most people want to learn how to read crochet patterns at some point, because it allows them to be able to make the things that they see on Pinterest, on blogs and in books. What you’ll discover as you dig into this world of crochet is that it has its own language.
It can feel really daunting to learn this language, but it will actually come to you quite quickly after the initial learning curve. Just think: before you began reading this article, you might not even have known that medium weight yarn is called “worsted” and has an assigned number of “4”. Now you do. You know that the basic stitch is called a “single crochet” and you’ll quickly come to learn that this is abbreviated “sc”. That abbreviation is something that you will see in crochet patterns and soon it will all make sense to you. Take your time, learn the basics, ask yourself what next steps are best for learning more and proceed from there.