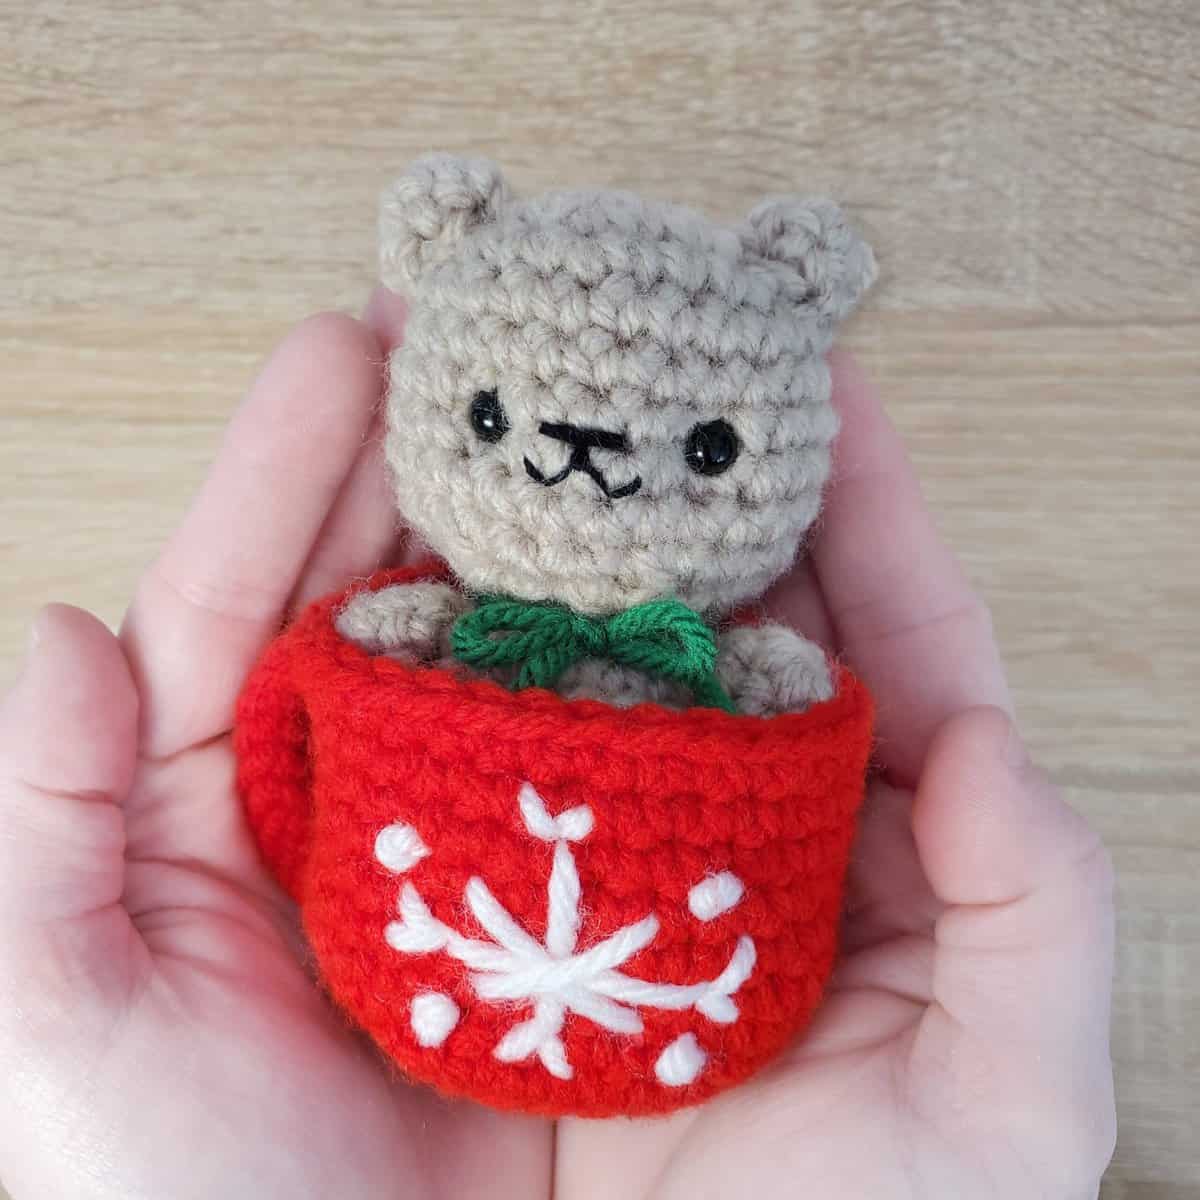
Hello all! It’s the most wonderful time of the year, and as a fun countdown to Christmas, why not create some winter-themed projects to give as gifts, decorate your home, or “spruce” up (pun 100% intended) an outfit or scarf?
Each day until Christmas Eve, we’ll be releasing a mini crochet pattern – starting with today’s Christmas bear crochet pattern! He makes an excellent ornament, stocking stuffer, or even just set out with your other holiday decor.

Materials Required
Today’s pattern is an amigurumi pattern, which means you’ll be working in a continuous spiral of single crochet stitches.
I recommend using a stitch marker to help you keep track of your rounds. It also involves a little embroidery, but I’ll walk you through how to make both the bear’s mouth and the snowflake on the cup part of the project.
Here are all of the materials required to make this project – feel free to make substitutions to the yarn colors, weight, and even the hook size.
My project ended up measuring about 4 inches tall. Remember, using a larger hook and yarn of a different weight will affect the finished size of your project!
| 4.25mm crochet hook |
| worsted weight yarn in brown, red/green, and white (you can also use whatever colors you’d like!) |
| tapestry needle |
| poly-fil stuffing |
| 6mm safety eyes |
| black embroidery thread |
Abbreviations
Here are all of my standard abbreviations.
Note: Some of these may not be used in the pattern – these are the stitches that I use most frequently! If you see an abbreviation that you are unfamiliar with, please refer back to this chart.
Note: For this project, increases and decreases are single crochet increases/ decreases unless otherwise specified! (This is generally the standard in amigurumi projects.)
| ML | magic loop |
| R | row/round |
| st | stitch |
| slp st | slip stitch |
| ch | chain |
| sc | single crochet |
| hdc | half double crochet |
| dc | double crochet |
| tr | treble crochet |
| FLOsc | front loop only single crochet |
| FLOscdec | front loop only single crochet |
| BLOsc | back loop only single crochet |
| BLOscdec | back loop only single crochet decrease |
| inc | increase |
| dec | decrease |
| dc | double crochet |
| ** | repeat |
| () | number of sts in row |
Bear
Use brown yarn (or whatever color you’re using to make your bear)
R1: ML 6sc (6)
R2: inc in each st around (12)
R3: *1sc, inc* around (18)
R4: *2sc, inc* around (24)
R5 – R9: sc in each st (5 rounds total)
R10: *2sc, dec* around (18)
R11: *sc, dec* around (12)
We’ll add our safety eyes and embroider the mouth here!
First, add the safety eyes between R7 & R8, about 4 stitches apart. Next, with your black embroidery thread and tapestry needle, sew a straight stitch between the eyes.
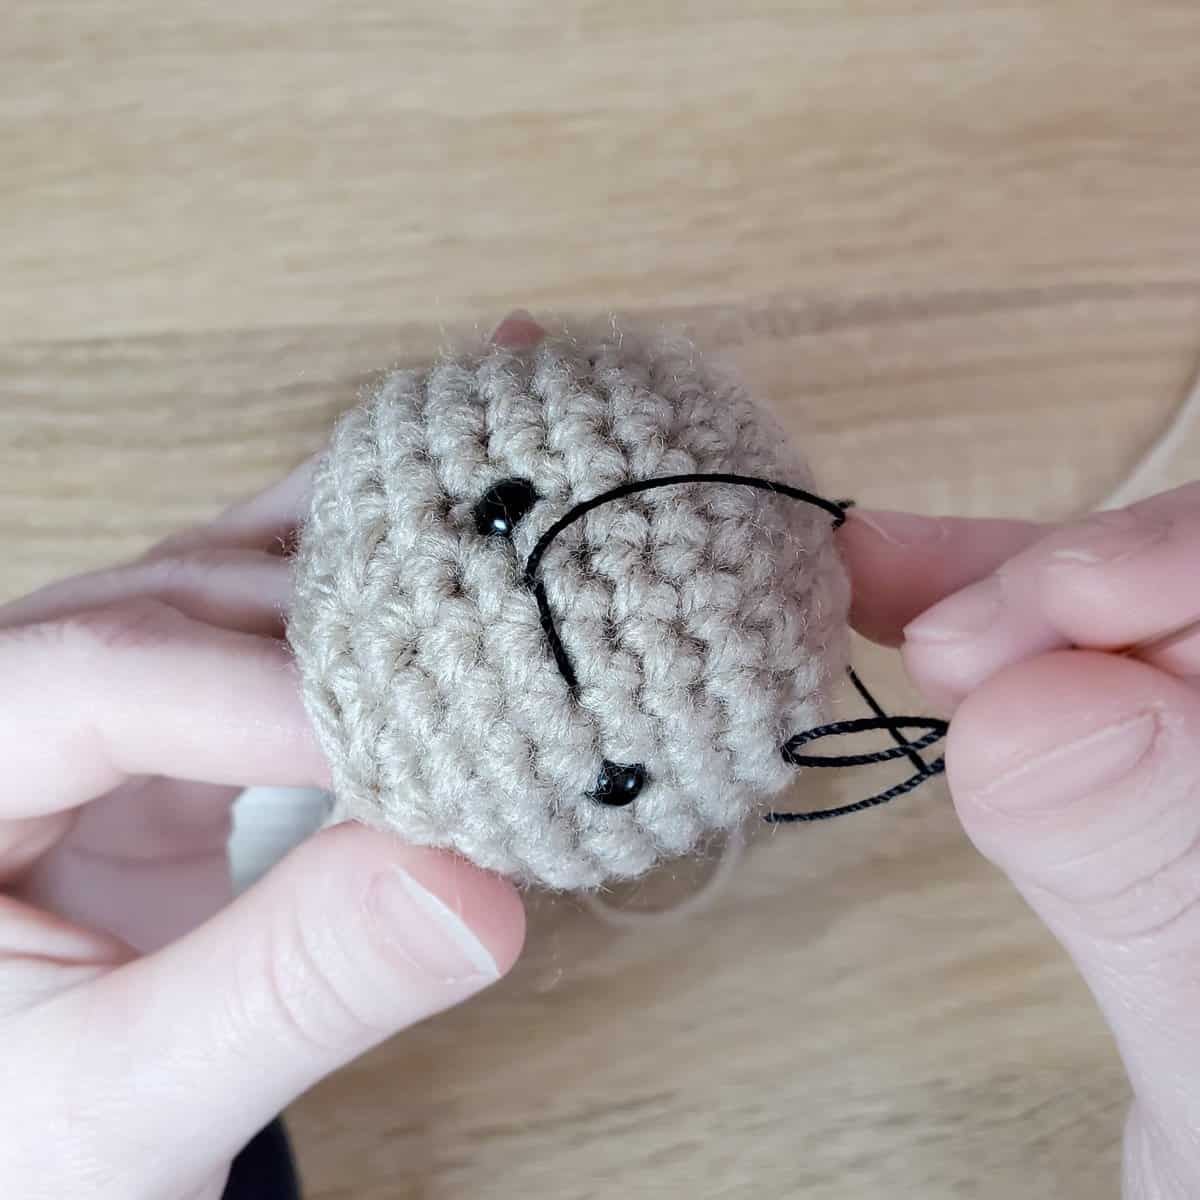
Repeat this straight stitch twice more to create the bear’s nose.

To make the mouth, run a straight stitch the same length as the nose directly under the nose (between R8 & R9).
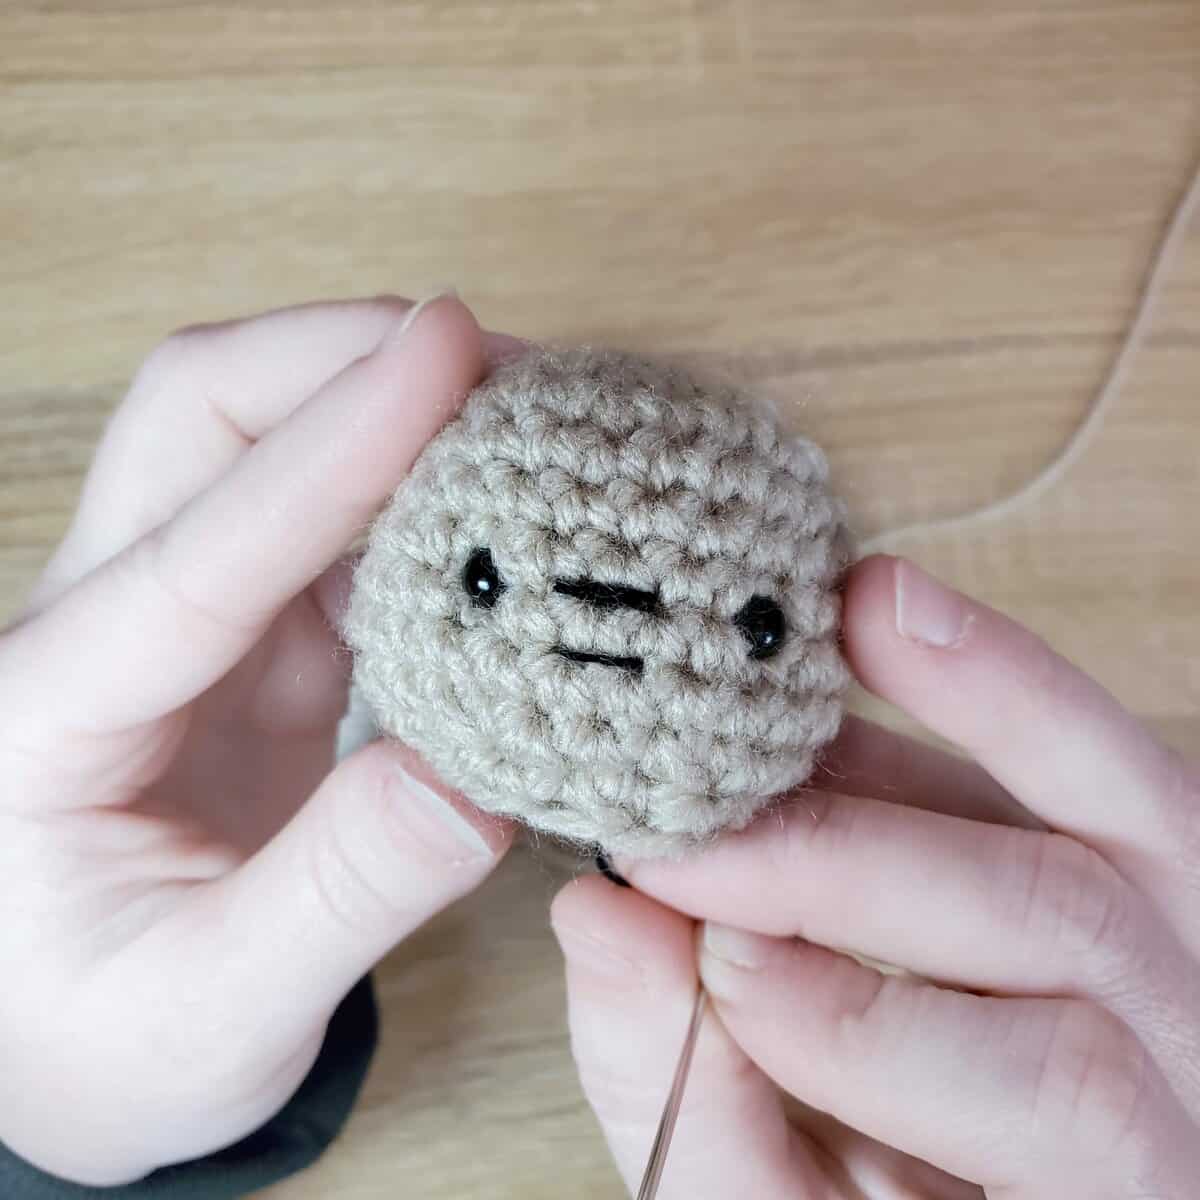
Next, sew up from inside the bear’s head directly under the nose.

Pass the sewing needle underneath and around the straight stitch you sewed underneath the nose.
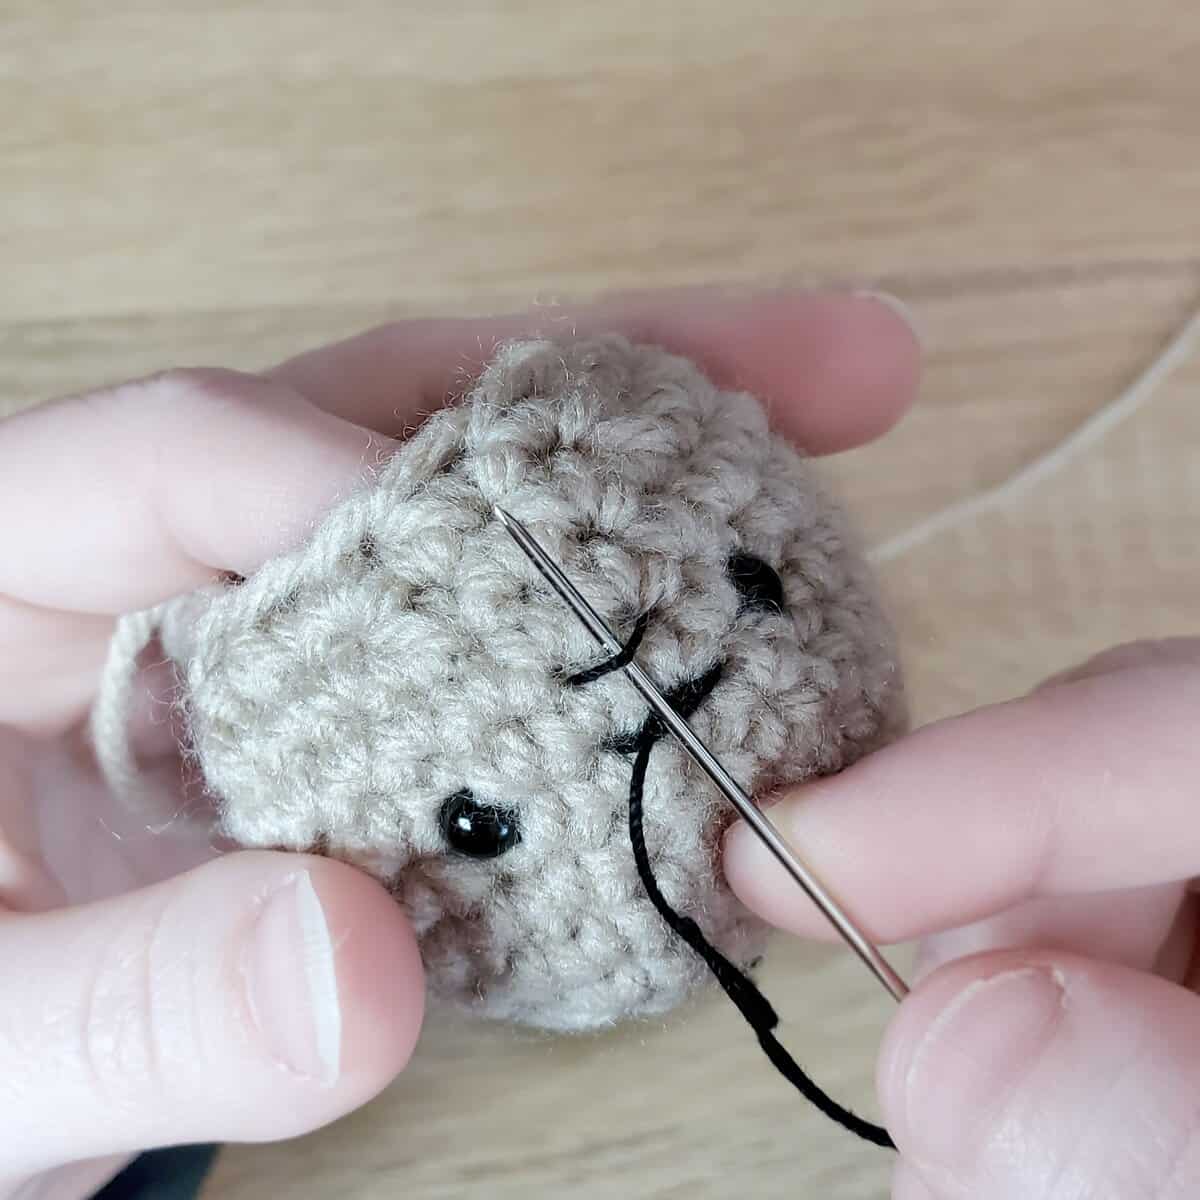
Pull the embroidery thread up towards the nose to create the “^” shape with the straight stitch you sewed underneath the nose:

Then, sew back down below the nose to lock the mouth in place!

Now we’ll add a bit more shape to the mouth, so the bear doesn’t look so grumpy.
Send your sewing needle up at the corner of the mouth – it needs to be a little higher and a little further out (closer to the eye).
Then, send your needle down through the corner of the mouth. Here’s the left side:
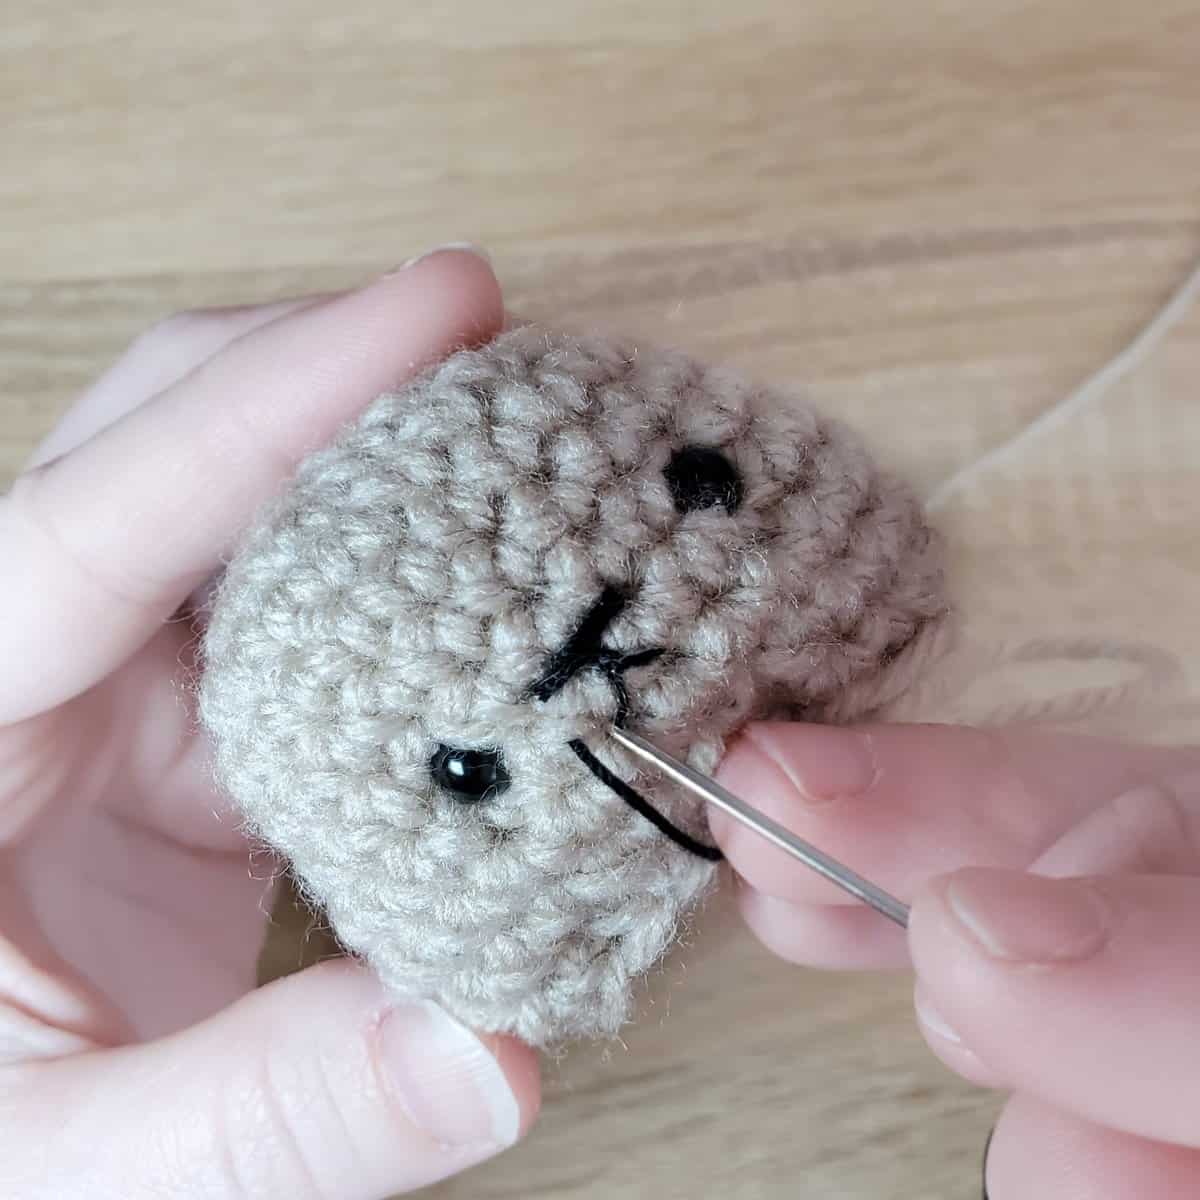
Repeat that on the right side to complete the mouth!

Here’s the finished embroidered face! Stuff the head here, too.

R12: dec in each st around (6)
We’ll continue working, as the body is all made in one piece for this pattern!
R13: 3FLOsc in each st around (18)
Note on using FLOsc: I find using FLO stitches helps direction changes. We’re basically skipping a row of normal increases by placing three single crochet stitches in each stitch, which will help round off the bear’s body without giving him a long neck.
R14: *2sc, inc* around (24)
R15 – R19: sc around (5 rounds total)
R20: *2sc, dec* around (18)
R21: *1sc, dec* around (12)
Stuff the lower half of the bear here!
R22: dec in each st (6)
Slip stitch, cut a long tail, and fasten off. Use this tail to sew through each of the remaining 6 stitches and pull tight to cinch the bear’s body closed. Using the same tail, sew up to the bear’s face.

We’re going to slightly shape the face by sewing a small straight stitch vertically on the inside of either eye and gently pulling the stitches. This sort of cinches the face and makes the nose more prominent – be careful not to pull too tightly!
Pull the tail up by the first eye, then sew the stitch. Send the needle to the other side, then pull gently to slightly cinch the bear’s eye.
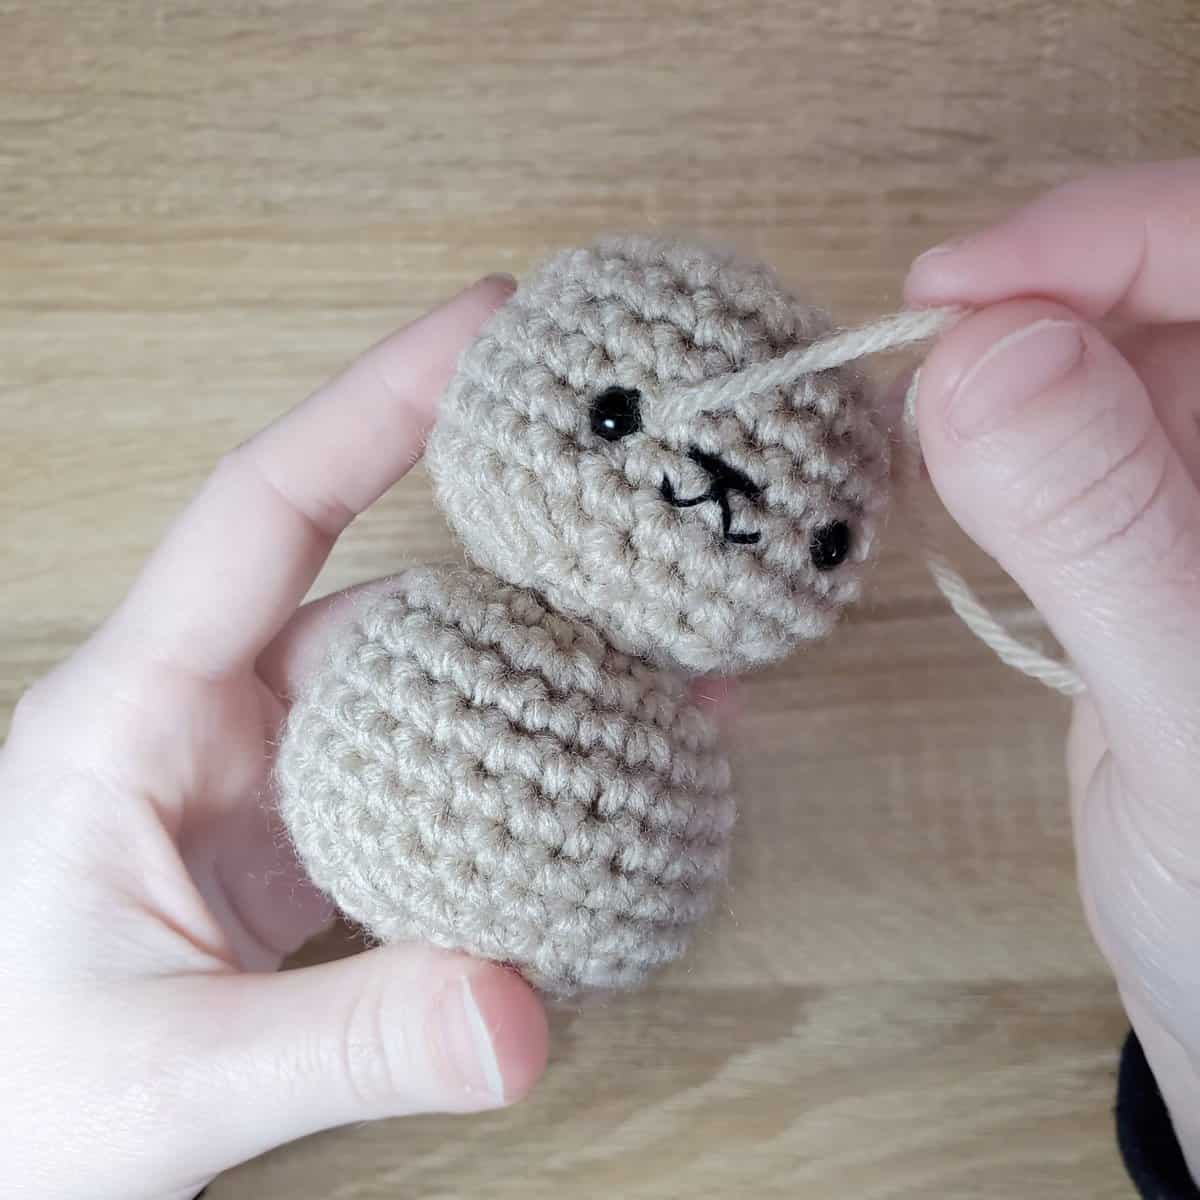
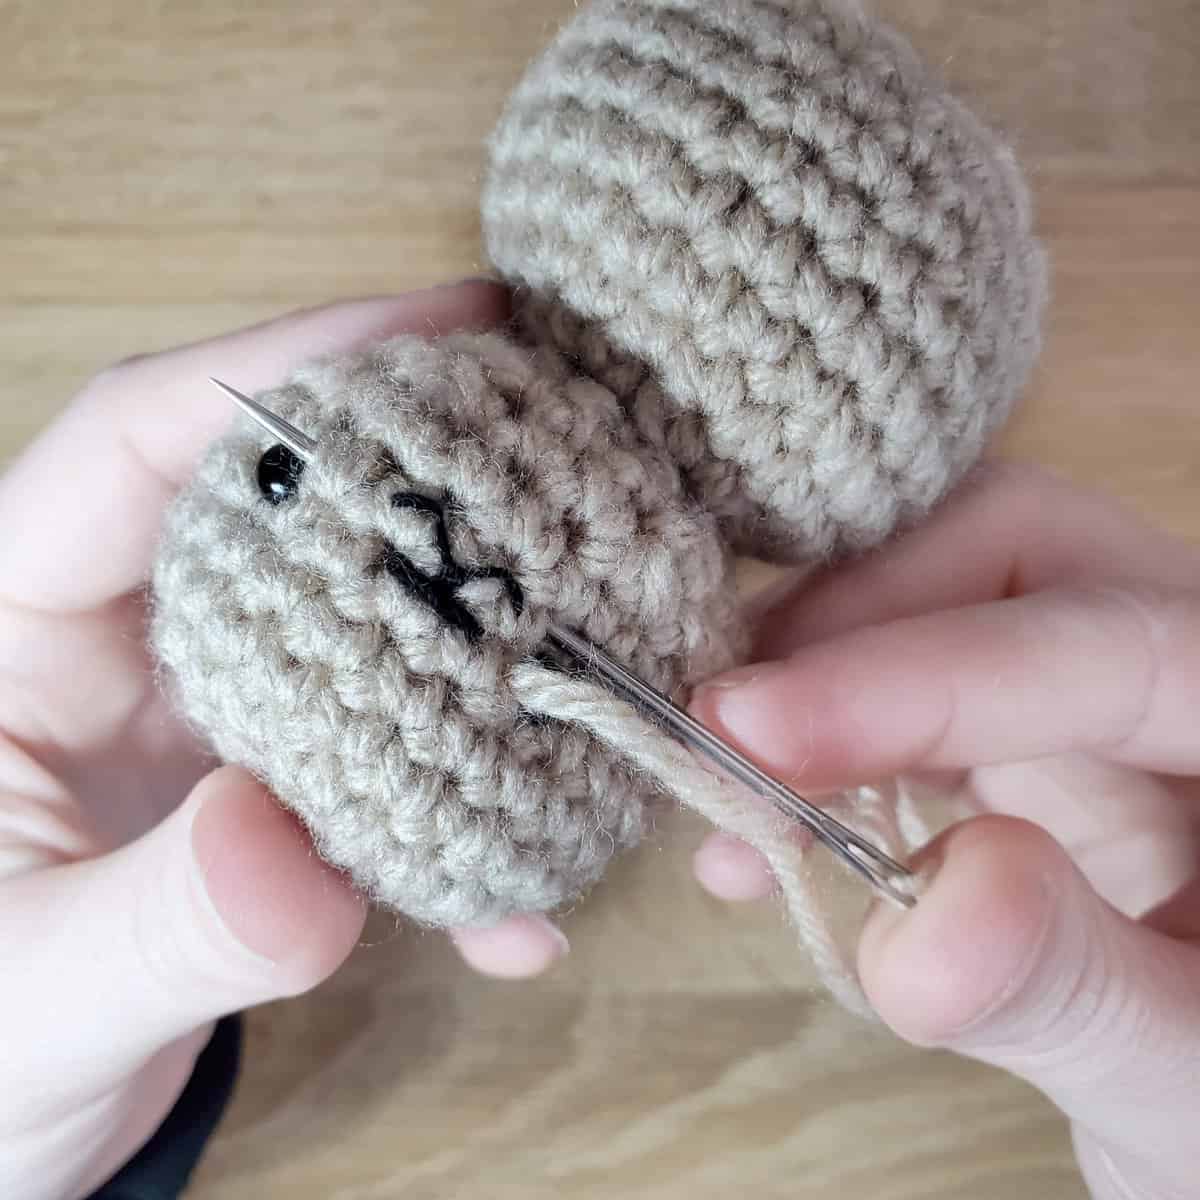
Repeat this on the other side, but this time send the tail down near the bear’s neck. Pull gently, then tie a knot and weave in the extra tail.
Bear Ears, Arms, and Feet
We’ll need to make 6 total of these – They work up fast, though! Use whatever color you used to make your bear.
R1: ML 6sc (6)
R2: sc in each st (6)
Slp st to the first sc of R2, then fasten off, leaving a long tail for sewing.
Once you’ve finished all six, we’ll attach two to the head and four to the body. Whip stitch each one on and weave in all unused tails.

I also like to tie a little yarn bow around my bear’s neck at this point – using a little scrap of yarn (I used a contrasting holiday color to the cup that the bear was going in), tie a bow!

Cocoa Cup
Use whatever color you’d like to make your cup (I made both a red and green cup).
R1: ML 6sc (6)
R2: inc in each st around (12)
R3: *2sc, inc* around (24)
R4: *3sc, inc* around (30)
R5: BLOsc in each st around (30)
Note on BLO: Like FLO stitches, BLO help with abrupt direction changes. We want the bottom of the cup to have a crisp edge, and making the stitches in the BLO helps with that!
R6 – R13: sc around (8 rounds total)
Fasten off by slip stitching to the last stitch of the round, cutting a short tail, and pulling the yarn through. Weave this tail in.
Snowflake Motif
Now we’ll embroider on the snowflake motif!
Using some white yarn, thread your tapestry needle and sew a straight stitch from the bottom to the top of the cup, like so:
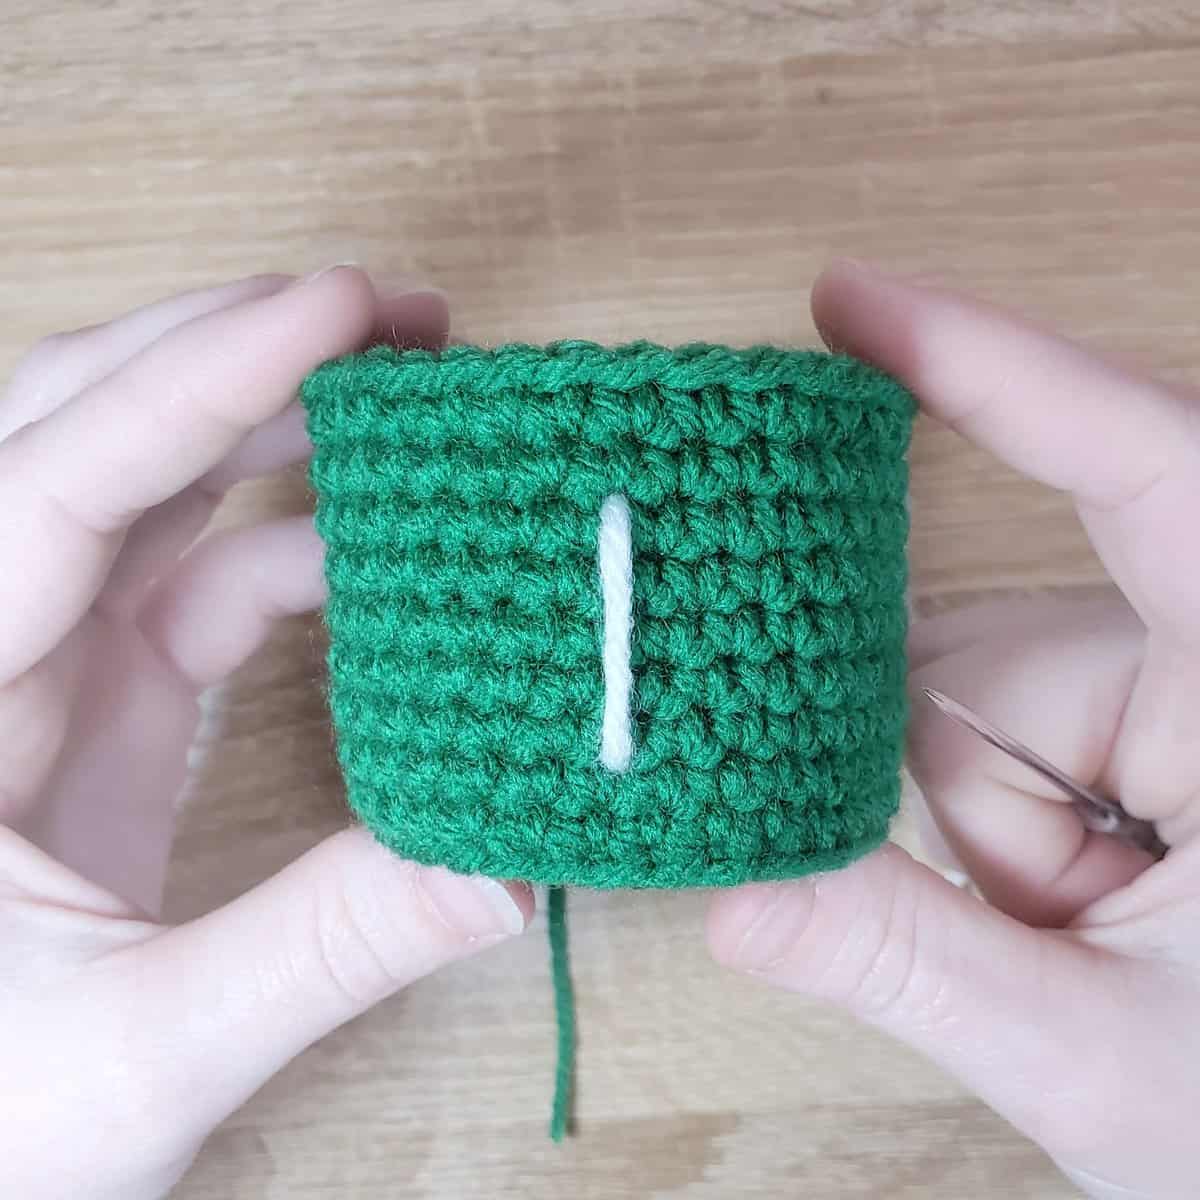
Then sew another straight stitch directly over the first, creating a cross:

Next, we’ll sew an “X” over this cross:
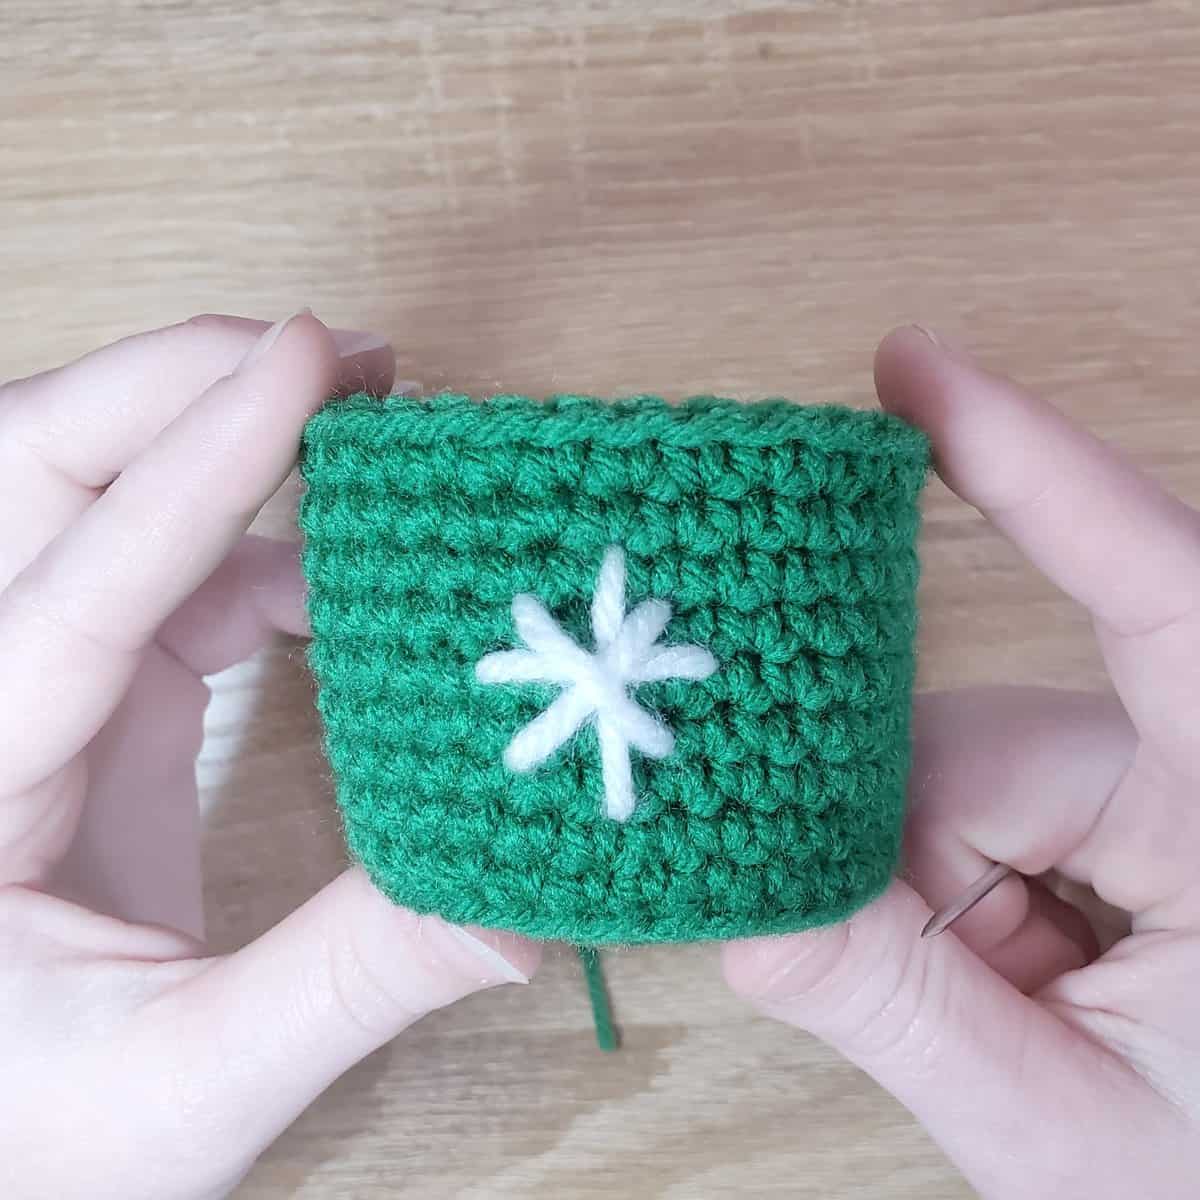
Now we’ll add the first “V” to the bottom – sew the first side, like so:

Add the other side:
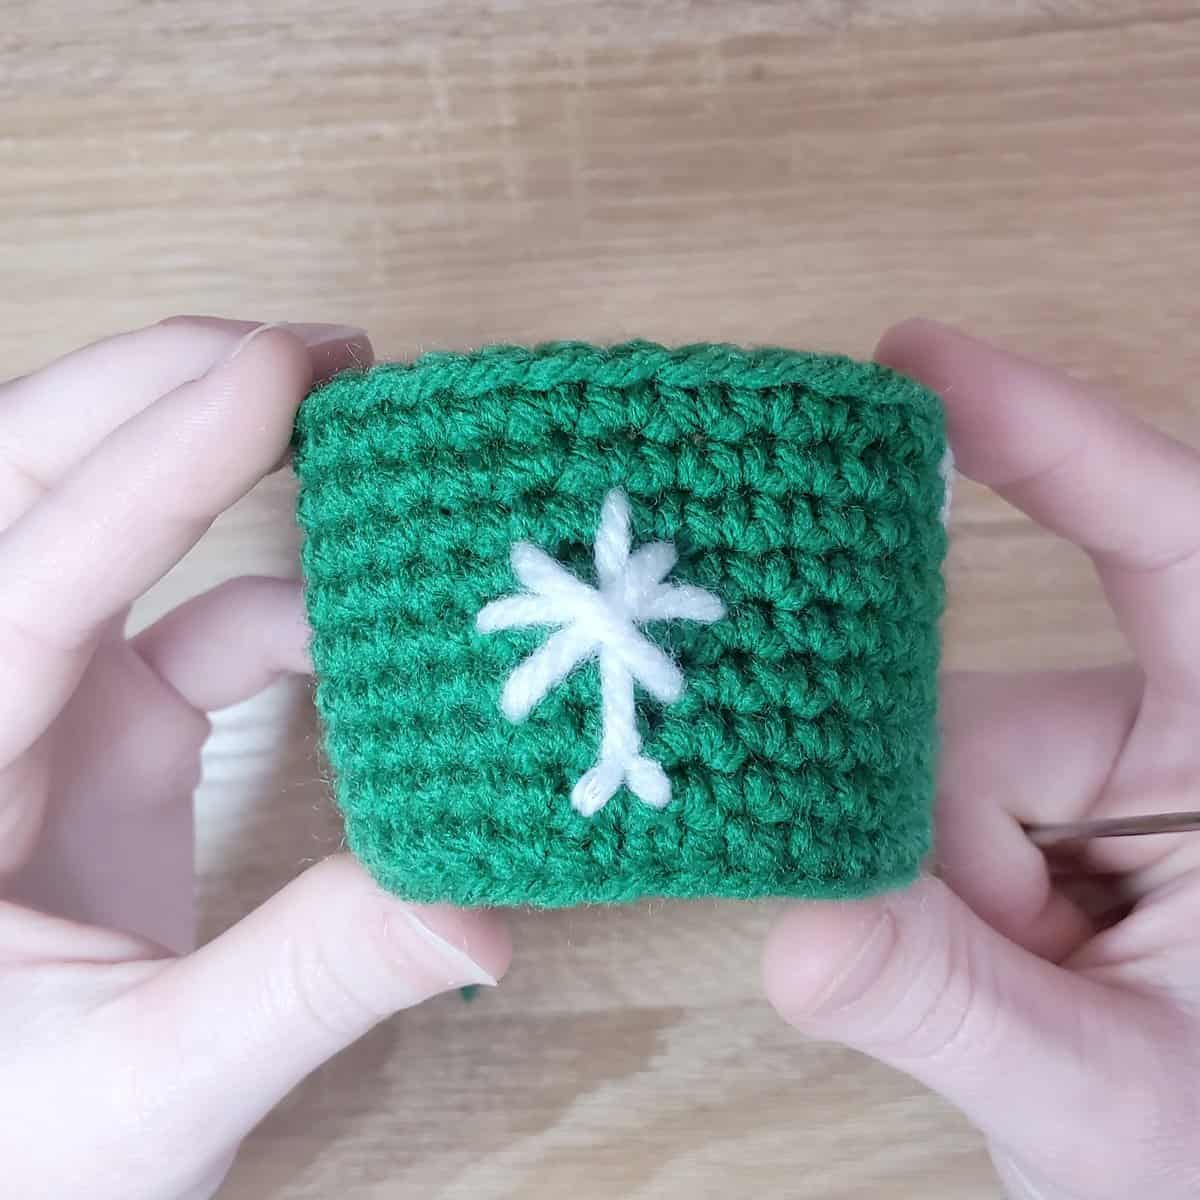
Moving counterclockwise to the next stitch we sewed, tie a French knot on the surface of the fabric:

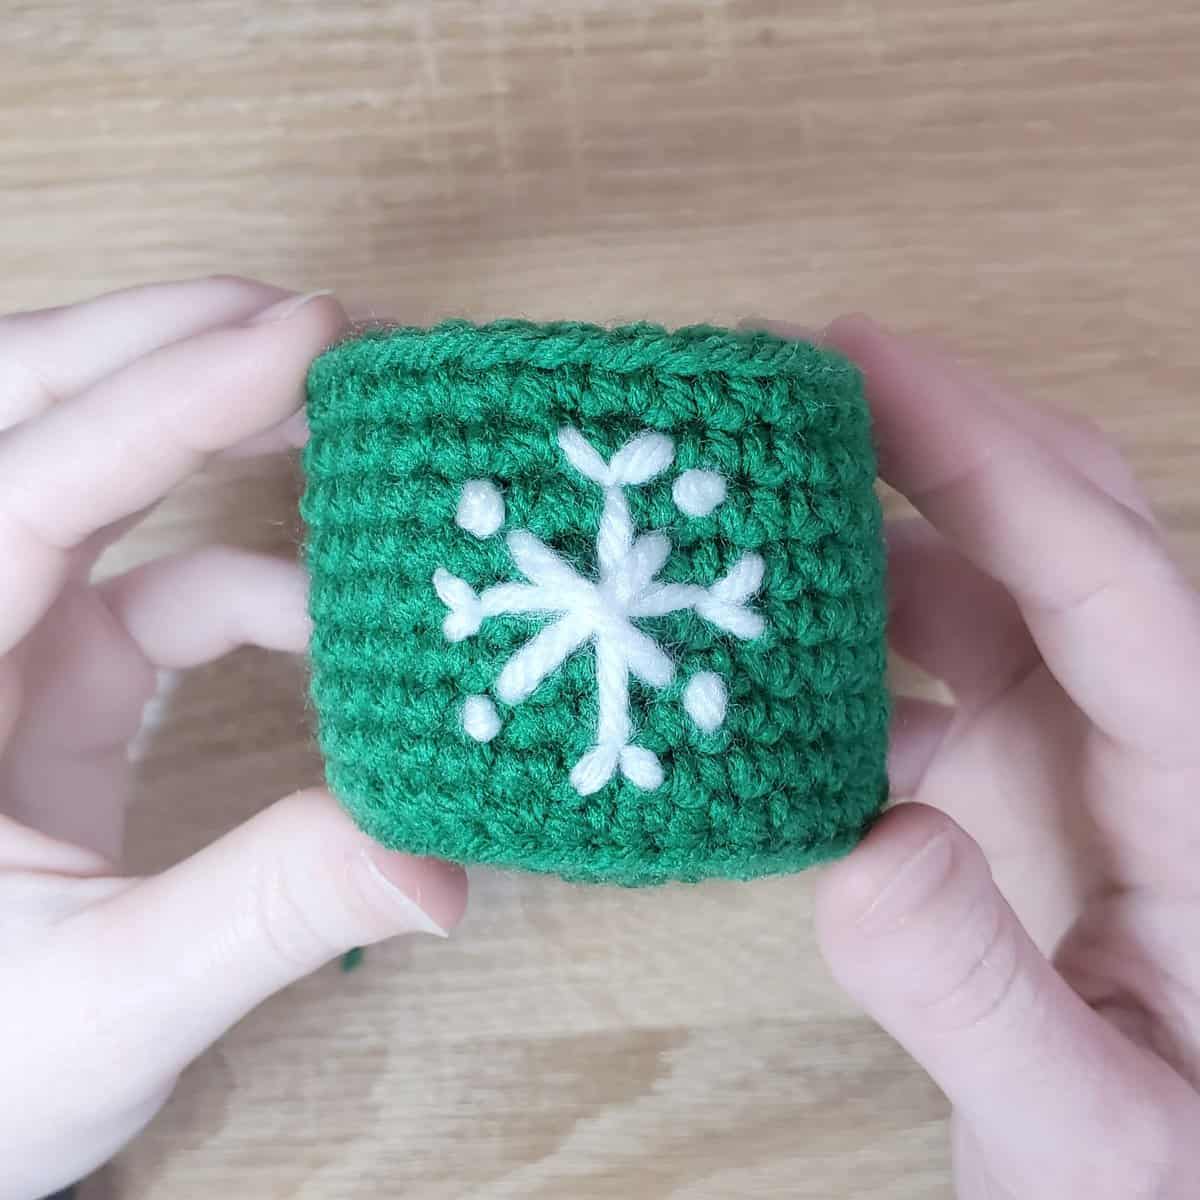
Continue this pattern, alternating between creating a “V” and a French knot.
I like to think about it like it’s a compass – north, south, east, and west all get a “V,” and the intermediate directions (like north east, etc.) get a French knot!
Here’s what the completed snowflake looks like:
Cup Handle
Once you’ve added on the snowflake motif, we’ll make the cup handle. Trust me – do this last if you sew the snowflake motif. It’s much easier to attach the handle afterward!
Use whatever color you used for the cup. I’m using green!
R1: ch 10
R2: slp st in each st down the chain
Fasten off, and leave a long tail. Use this tail to sew the cup handle on – once you attach one side of the handle, weave the tail into the cup’s body up to where the other side of the handle will go. Use the same tail to attach the other side of the handle, then weave in the end.

All you need to do is put your Cocoa Bear into the cup and you’ve finished today’s make!
