
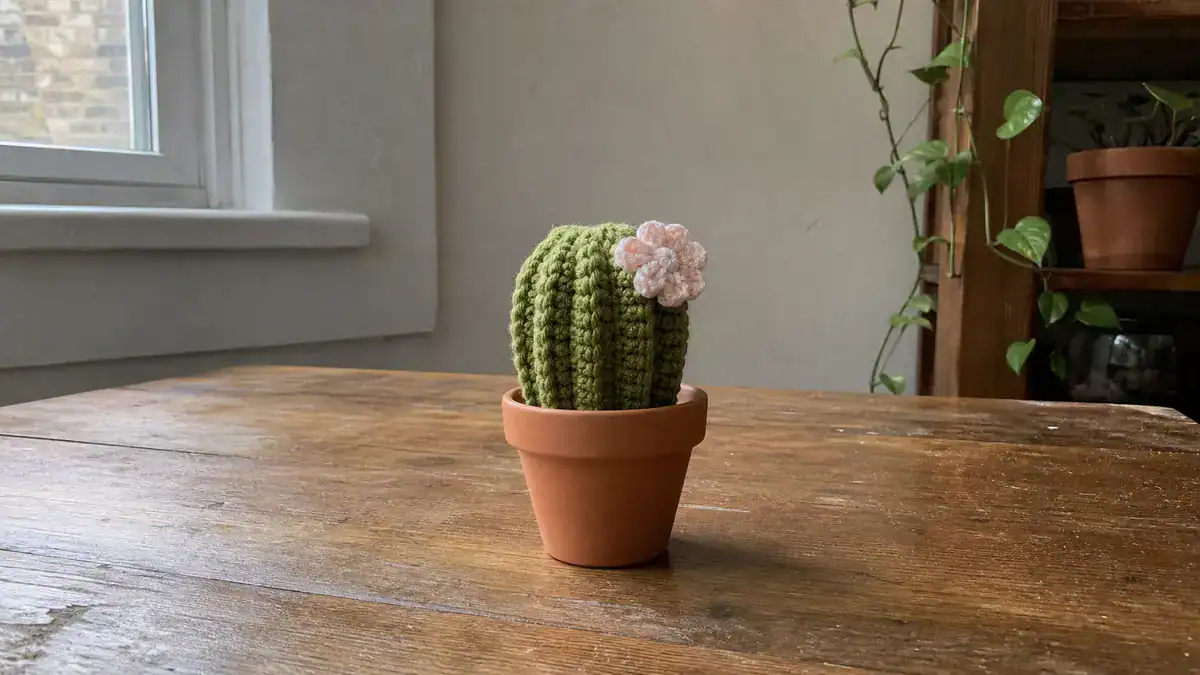
Crochet enthusiasts and beginners alike, get ready to embark on a delightful journey into the world of amigurumi with a charming twist! YouTuber Libby has created an engaging tutorial titled “How to Crochet a Cactus for Beginners,” which has been capturing the hearts of crafters everywhere.
Don't lose this article. Enter your email below, and I'll send it to you right now. Plus a little crochet inspiration from me, straight to your inbox.
In this article, we’ll dive into the key points of Libby’s video, available here, and offer some additional tips and insights to help you create your very own adorable crochet cactus.
Let’s start with the materials you’ll need for this project:
- Crochet hook (Libby uses a 3.75mm, but mentions that a 3.5mm or 4mm would work fine)
- Green acrylic yarn for the cactus body (Libby uses Stylecraft Special DK)
- Contrasting color yarn for the flower
- Scissors
- Yarn needle
- Toy stuffing
- Safety eyes (optional)
- Small terracotta pot (optional)
Tip: While Libby uses acrylic yarn, you could experiment with different yarn types for varying textures. Cotton yarn, for example, might give your cactus a more rigid structure, while a wool blend could add a softer, fuzzy texture.
Now, let’s break down the key steps of the tutorial:
- Creating the Cactus Body: Libby starts by teaching how to make a slip knot and chain 19 stitches. She then demonstrates how to single crochet into each chain across, starting from the second chain from the hook. This results in 18 single crochet stitches.
Tip: If you’re new to crochet, practice making chains and single crochet stitches before starting the project. This will help you get comfortable with the basic techniques and ensure more even stitches in your final product.
- Forming the Cactus Texture: For the next 20 rows, Libby instructs to work single crochet stitches into the back loop only. This technique creates a ribbed texture that mimics the look of a real cactus.
Tip: To keep track of your rows without constantly counting, try using stitch markers or a row counter. You could also use a piece of contrasting yarn to mark every fifth row, making it easier to count as you go.
- Adding Optional Features: Libby shows how to add safety eyes and an embroidered smile to give the cactus a cute, cartoon-like appearance. She emphasizes that this step is optional and can be done according to personal preference.
Tip: If you’re making this cactus for a young child, consider skipping the safety eyes and instead embroider both the eyes and smile. This eliminates any small parts that could potentially come loose.
Don't lose this article. Enter your email below, and I'll send it to you right now. Plus a little crochet inspiration from me, straight to your inbox.
- Assembling the Cactus: The tutorial then covers how to sew the sides of the cactus together using a whip stitch, leaving an opening for stuffing. Libby demonstrates a “drawstring” method to close the top and bottom of the cactus.
Tip: When stuffing your cactus, use small amounts of stuffing at a time and distribute it evenly. This will help maintain the cactus shape and prevent lumps.
- Creating the Flower: Libby guides viewers through creating a small flower to top the cactus using a magic ring technique and forming petals with chains and slip stitches.
Tip: Don’t limit yourself to just one flower! You could create multiple smaller flowers or even add some crochet “spines” using a thin yarn or embroidery floss for added texture.
Throughout the tutorial, Libby offers helpful advice and alternatives. For instance, she suggests that if you don’t have a terracotta pot, you can crochet your own base or use any small container you have on hand. This flexibility encourages viewers to get creative and make the project their own.
Now, let’s delve into some additional tips and insights that can enhance your crochet cactus-making experience:
- Experiment with Size: While Libby’s tutorial creates a small, cute cactus, you can easily adjust the size by changing your yarn weight and hook size. Using chunky yarn with a larger hook will result in a bigger cactus, perfect for a statement piece. Conversely, using thin yarn with a small hook can create tiny, adorable cacti suitable for keychains or earrings.
- Play with Colors: Don’t feel confined to traditional cactus colors. Why not create a pastel pink cactus or a vibrant rainbow one? You could even use variegated yarn to create an interesting color effect without changing yarns.
- Add Some Sparkle: For a touch of whimsy, consider using a yarn with a metallic thread running through it, or add some sequins or beads to your flower for extra sparkle.
- Create a Cactus Family: Once you’ve mastered the basic technique, try creating cacti of different shapes and sizes. You could make a tall, thin cactus, a round barrel cactus, or even a multi-armed saguaro cactus. Group them together for a charming crochet cactus garden.
- Functional Cacti: Transform your crochet cactus into functional items. A larger version could become a quirky throw pillow, while a flatter interpretation could serve as a fun coaster.
- Seasonal Decorations: Adapt your cactus for different seasons or holidays. Add a Santa hat for Christmas, bunny ears for Easter, or a witch’s hat for Halloween.
- Educational Tool: If you’re a teacher or parent, these crochet cacti can be used as a fun, tactile way to teach children about desert ecosystems and plant life.
- Eco-Friendly Gift Toppers: Small crochet cacti make adorable, reusable gift toppers. They’re a great alternative to disposable bows and can be a gift in themselves.
- Tension Matters: Pay attention to your tension as you crochet. Consistent tension will result in a neater finish. If you’re a beginner, don’t worry if your tension varies a bit – it adds character to your cactus!
- Personalize Your Pot: If you’re using a terracotta pot, consider painting it or decoupaging it with colorful paper for a truly unique finish.
Remember, the joy of crochet lies not just in the final product, but in the process itself. Don’t be afraid to make mistakes – they’re part of the learning process and often lead to happy accidents and new ideas.
Libby’s tutorial opens up a world of possibilities for crochet enthusiasts. Whether you’re a beginner looking for an easy, satisfying project, or an experienced crocheter seeking a quick, fun make, this crochet cactus fits the bill. It’s a project that combines the satisfaction of crafting with the joy of creating something truly unique and adorable.
So, grab your hooks and yarn, and get ready to join the crochet cactus craze! Who knows? You might find yourself with a whole garden of woolly succulents before you know it. Happy crocheting!

Oh I just love these!!!! Yes, quite simply the desert is amazing…love the sunsets – purple, blue, red and orange – nothing quite like it, the monsoons, the cacti, the smell in the air – these little cacti crochet projects look so fun! thanks for sharing!!