By Molly Hart
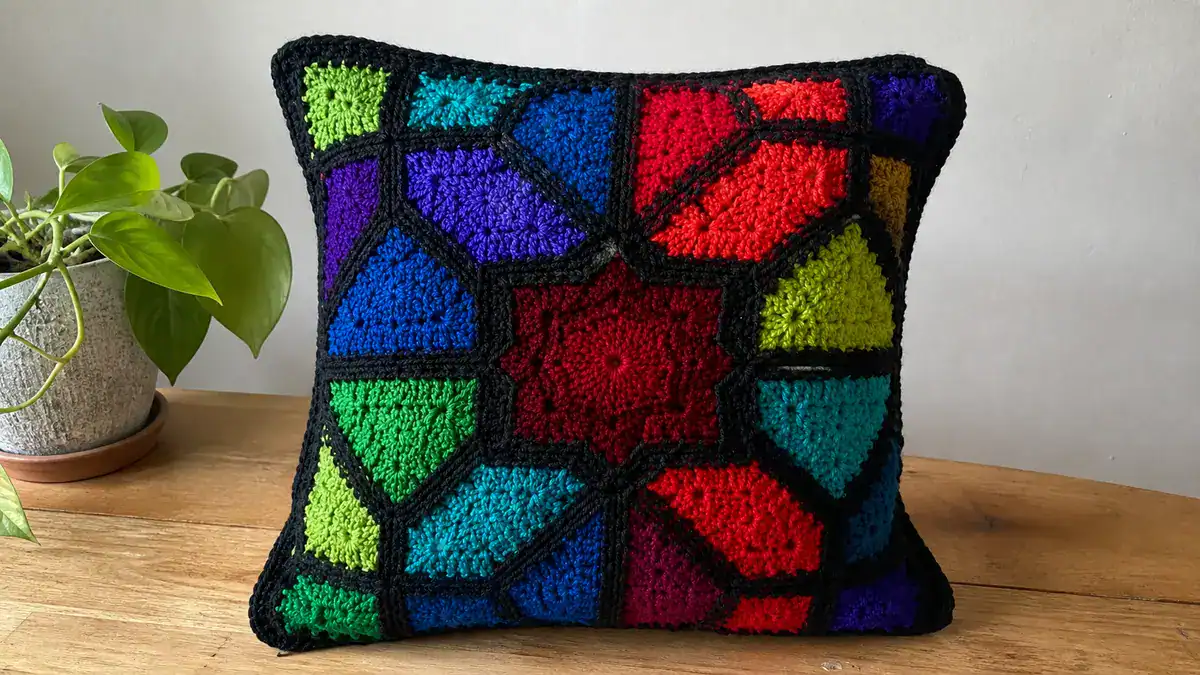
There’s something truly magical about the way light catches stained glass, and bringing that aesthetic into your home decor is easier than you might think! This Easy Stained Glass Crochet Pillow Cover combines the striking contrast of black “lead” lines with vibrant, jewel-toned yarn to create a masterpiece for your living room.
Don't lose this article. Enter your email below, and I'll send it to you right now. Plus a little crochet inspiration from me, straight to your inbox.
Perfect for confident beginners, this free crochet pattern uses a simple technique called the spike stitch (or long single crochet) to create the geometric grid. There’s no complicated colorwork or carrying yarn across the back—you only ever work with one color at a time! The result is a squishy, modern pillow cover that looks incredibly intricate but works up in a breeze.
Quick Stats:
- Skill Level: Easy
- Finished Size: 16 × 16 inches
- Yarn: Worsted weight, approx 500 yards total
- Hook: US H/8 (5.0 mm)
Scroll down for the complete free pattern with stitch counts at every row!
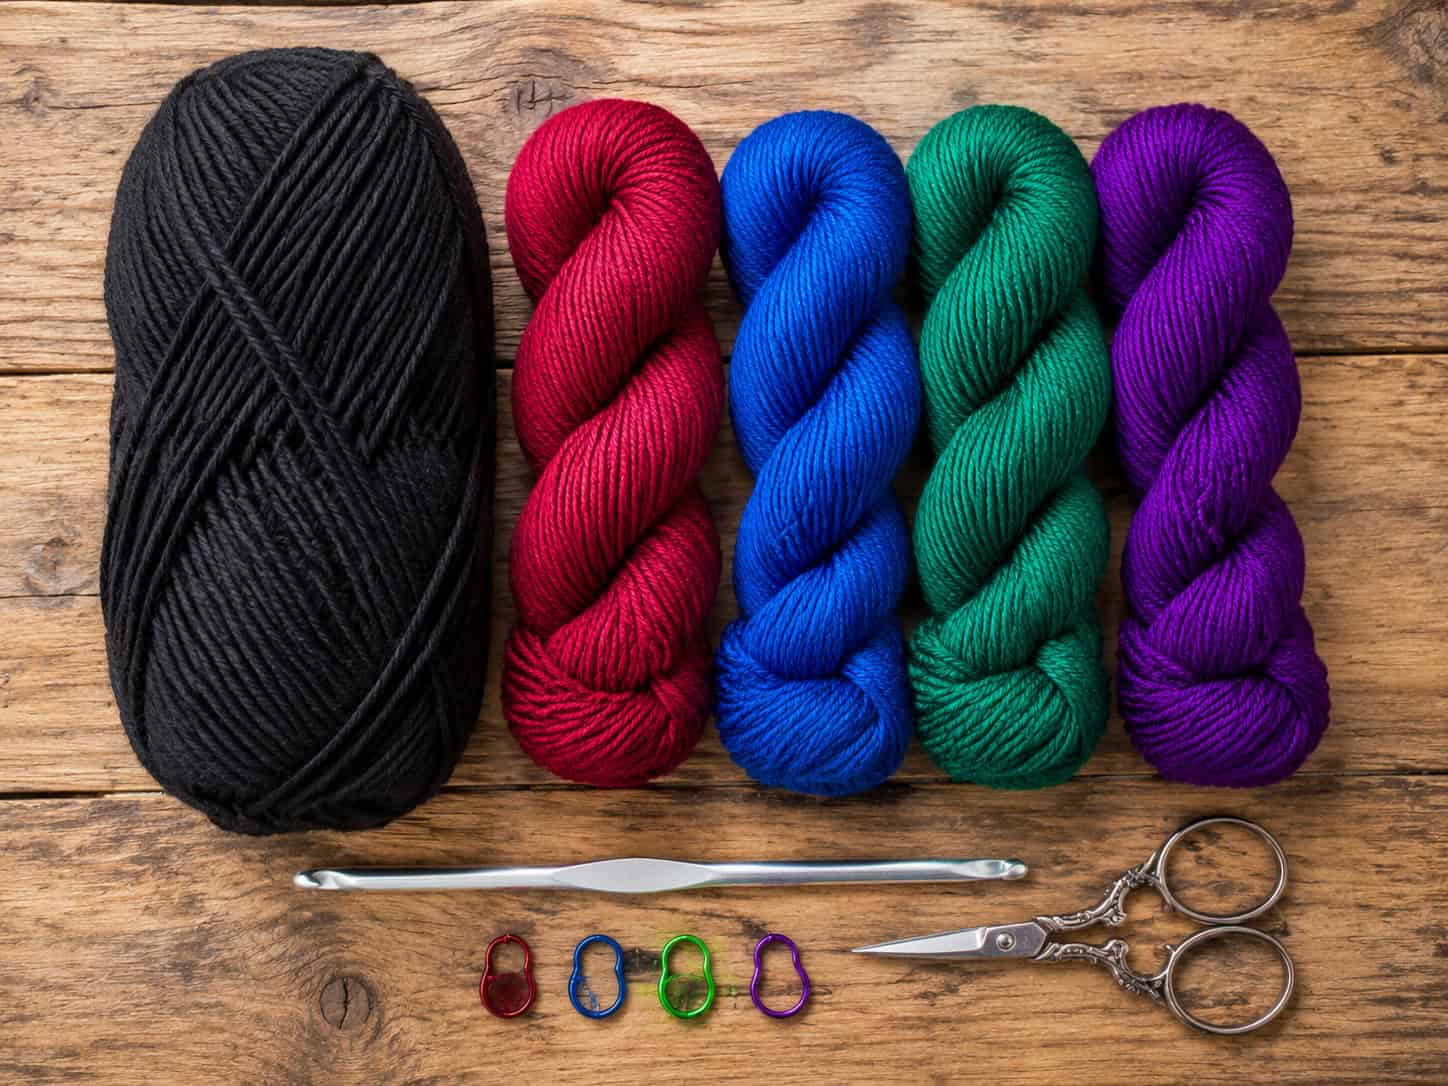
What You’ll Need
- Yarn: Worsted (Weight 4) yarn in 5 colors — approximately 500 yards total
- Main Color (Black): 300 yards
- Contrast Color 1 (Ruby Red): 50 yards
- Contrast Color 2 (Sapphire Blue): 50 yards
- Contrast Color 3 (Emerald Green): 50 yards
- Contrast Color 4 (Amethyst Purple): 50 yards
- Hook: US H/8 (5.0 mm) crochet hook
- Notions: Yarn needle, scissors, stitch markers
- Insert: 16×16 inch pillow form
- Gauge: 14 sts × 16 rows = 4″ in single crochet
Tips Before You Start
- Gauge check: Because this pattern is designed to fit a standard 16×16 inch pillow insert, checking your gauge is important. If your square is coming out too small, go up a hook size!
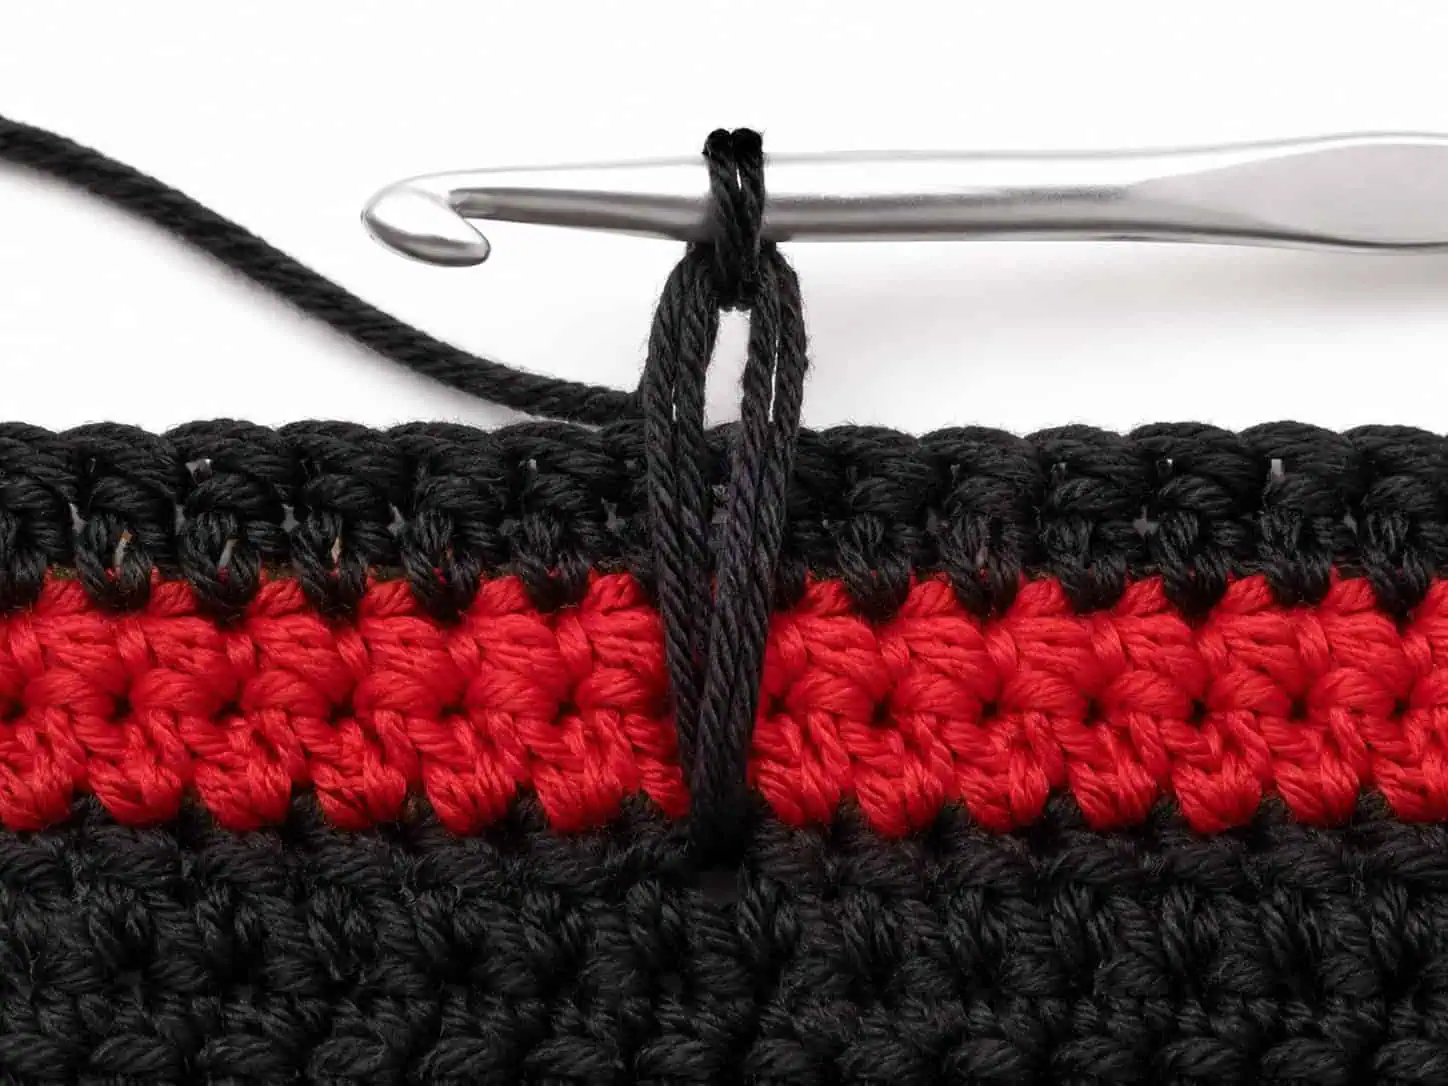
- The Spike Stitch: Don’t pull your spike stitches too tight! When you pull the yarn up from two rows below, ensure the loop is loose enough to reach the top of your current working row without puckering the fabric.
- Color Management: Since you change colors every two rows, you can choose to carry the black yarn loosely up the side of the work to save on weaving in ends, but you should cut the brightly colored yarns after their two-row sections.
Pattern Instructions
Special Stitches
Spike Single Crochet (SPsc): Insert hook in the indicated stitch 2 rows below the current working row. Yarn over and pull up a long loop to the height of the current working row. Yarn over and pull through both loops on the hook. This creates the vertical “lead” lines of the stained glass.
Notes
- The pillow cover is made in three panels: one stained glass front panel and two solid black back panels that overlap to create an envelope closure.
- Ch 1 at the beginning of a row does NOT count as a stitch.
- When changing colors, complete the last step of the final stitch of the row with the new color.
- Stitch counts are given in bold at the end of each row.
Front Panel
Foundation: With CC1 (Ruby), ch 57.
Row 1 (RS): Sc in 2nd ch from hook and in each ch across. (56 sts)
Row 2 (WS): Ch 1, turn. Sc in each st across. Change to MC (Black) in the last step of the final st. (56 sts)
Row 3 (RS): With MC, ch 1, turn. *Sc in next 5 sts, SPsc in next st 2 rows below; rep from * 8 more times, sc in last 2 sts. (56 sts)
Row 4 (WS): Ch 1, turn. Sc in each st across. Change to CC2 (Sapphire) in the last step of the final st. (56 sts)
Row 5 (RS): With CC2, ch 1, turn. Sc in each st across. (56 sts)
Row 6 (WS): Ch 1, turn. Sc in each st across. Change to MC in the last step of the final st. (56 sts)
Row 7 (RS): With MC, ch 1, turn. Sc in next 2 sts, SPsc in next st 2 rows below, *sc in next 5 sts, SPsc in next st 2 rows below; rep from * 7 more times, sc in last 5 sts. (56 sts)
Row 8 (WS): Ch 1, turn. Sc in each st across. Change to CC3 (Emerald) in the last step of the final st. (56 sts)
Rows 9-10: With CC3, ch 1, turn. Sc in each st across for 2 rows. Change to MC at the end of Row 10. (56 sts)
Rows 11-12: With MC, repeat Rows 3-4. Change to CC4 (Amethyst) at the end of Row 12. (56 sts)
Don't lose this article. Enter your email below, and I'll send it to you right now. Plus a little crochet inspiration from me, straight to your inbox.
Rows 13-14: With CC4, ch 1, turn. Sc in each st across for 2 rows. Change to MC at the end of Row 14. (56 sts)
Rows 15-16: With MC, repeat Rows 7-8. Change to CC1 at the end of Row 16. (56 sts)
Rows 17-64: Repeat Rows 1-16 three more times, ending with a Row 16 repeat. Fasten off all colors. (56 sts)
Back Panel – Bottom
Foundation: With MC, ch 57.
Row 1 (RS): Sc in 2nd ch from hook and in each ch across. (56 sts)
Rows 2-40: Ch 1, turn. Sc in each st across. Fasten off after Row 40. (56 sts)
Back Panel – Top
Foundation: With MC, ch 57.
Row 1 (RS): Sc in 2nd ch from hook and in each ch across. (56 sts)
Rows 2-32: Ch 1, turn. Sc in each st across. Fasten off after Row 32. (56 sts)
Finishing & Assembly
- Weave in all ends on all three panels.
- Block panels to measurements: Front should be 16×16 inches. Bottom Back should be 16×10 inches. Top Back should be 16×8 inches.
- Assembly: Place the Front Panel face down on your workspace. Place the Top Back Panel face up on top of the Front Panel, aligning the top and side edges. Place the Bottom Back Panel face up, aligning the bottom and side edges. The two back panels will overlap by about 2 inches in the center.
- Pin the layers together securely around all four sides.
- Border/Seaming Round: Join MC in any corner, working through all thicknesses. Ch 1, sc evenly around the entire perimeter, working 3 sc in each corner to turn. Sl st to the first sc to join. Fasten off. (232 sts)
- Weave in final ends, turn right side out through the envelope opening, and insert your pillow form.
Make It Your Own
- Color variations: Instead of jewel tones, try a monochromatic ombre effect (light blue to dark blue) separated by crisp white lines instead of black!
- Size adjustments: To make a larger pillow, increase your foundation chain by a multiple of 6. Every 6 stitches adds about 1.7 inches to the width.
- Scrap buster: Use a different scrap yarn color for every single 2-row color block to create a true mosaic glass look.
Frequently Asked Questions
How much yarn do I need for this pillow cover?
You’ll need approximately 300 yards of your main color (black) since it makes up the grid and the entire back of the pillow. You only need about 50 yards each of your 4 contrast colors.
What size crochet hook should I use?
This pattern uses a US H/8 (5.0 mm) hook. Adjust up or down to match the gauge of 14 sc per 4 inches.
Can I use a different yarn weight?
Yes! However, if you use a lighter yarn like DK, your pillow will turn out smaller. You will need to recalculate your starting chain (using a multiple of 6 + 3) to reach 16 inches.
Is this pattern beginner-friendly?
Absolutely. If you can single crochet and change colors, you can make this pillow! The spike stitch is just a single crochet worked slightly lower down in the fabric.
I’d love to see your finished stained glass pillows! Tag me on Instagram or share in our Facebook group.
Pin this pattern for later!
© 2024 Crochet Concupiscence. This pattern is free for personal use. Please do not reproduce or sell the pattern itself. You may sell finished items made from this pattern with credit to Crochet Concupiscence.