By Annie Brooks
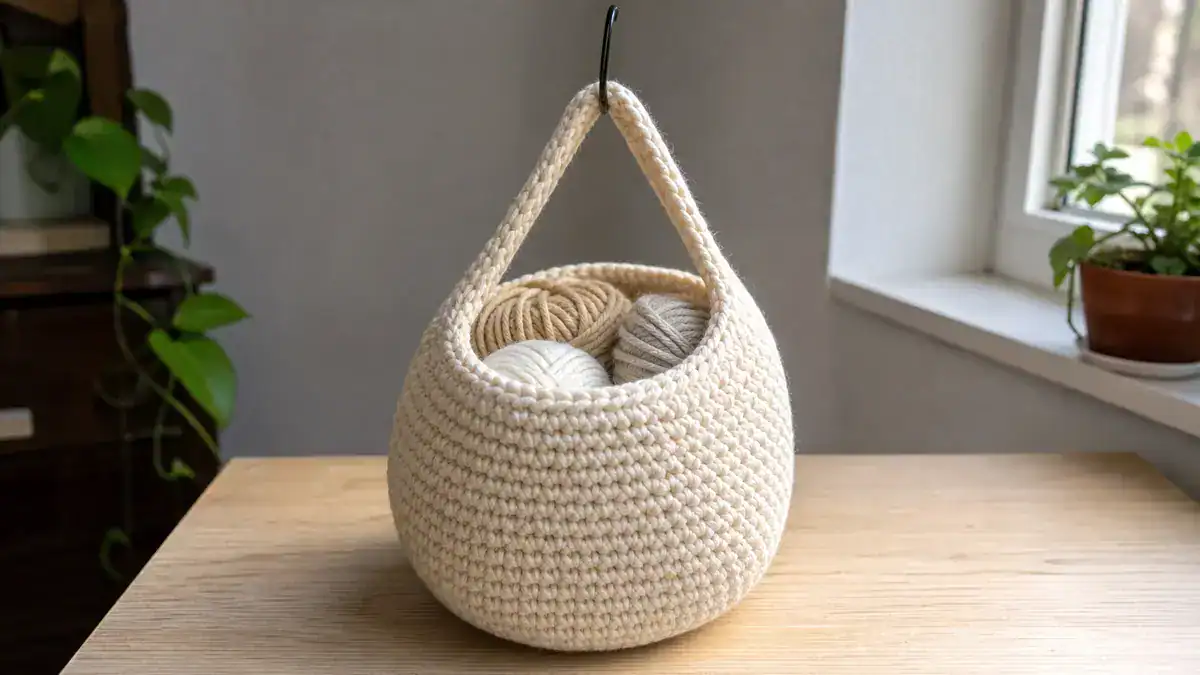
There is something incredibly satisfying about crocheting your own home organization solutions. This Easy Crochet Hanging Basket combines the rustic charm of handmade decor with pure, functional practicality. Whether you need a stylish home for a trailing pothos plant, a catch-all for your entryway keys, or a space-saving storage solution for bathroom essentials, this basket works up in just a few hours.
Don't lose this article. Enter your email below, and I'll send it to you right now. Plus a little crochet inspiration from me, straight to your inbox.
Perfect for confident beginners, this pattern relies entirely on the basic single crochet stitch. By using super bulky cotton yarn and a slightly smaller hook than the yarn label recommends, we create a dense, stiff fabric that holds its shape beautifully without the need for wire or starch.
Quick Stats:
- Skill Level: Easy
- Finished Size: 6 inches wide by 7 inches tall
- Yarn: Super Bulky (Weight 6) cotton blend
- Time to Make: 2-3 hours
Scroll down for the complete free pattern, complete with stitch counts at the end of every single round!
What You’ll Need
- Yarn: Super Bulky (Weight 6) cotton or cotton-blend yarn — approximately 120 yards (110 m). (Note: T-shirt yarn or holding two strands of worsted weight cotton together also works wonderfully!)
- Hook: US L/11 (8.0 mm) crochet hook
- Notions: Stitch marker, yarn needle, and scissors
- Gauge: 9 sts and 10 rows = 4 inches (10 cm) in single crochet (sc)
Tips Before You Start
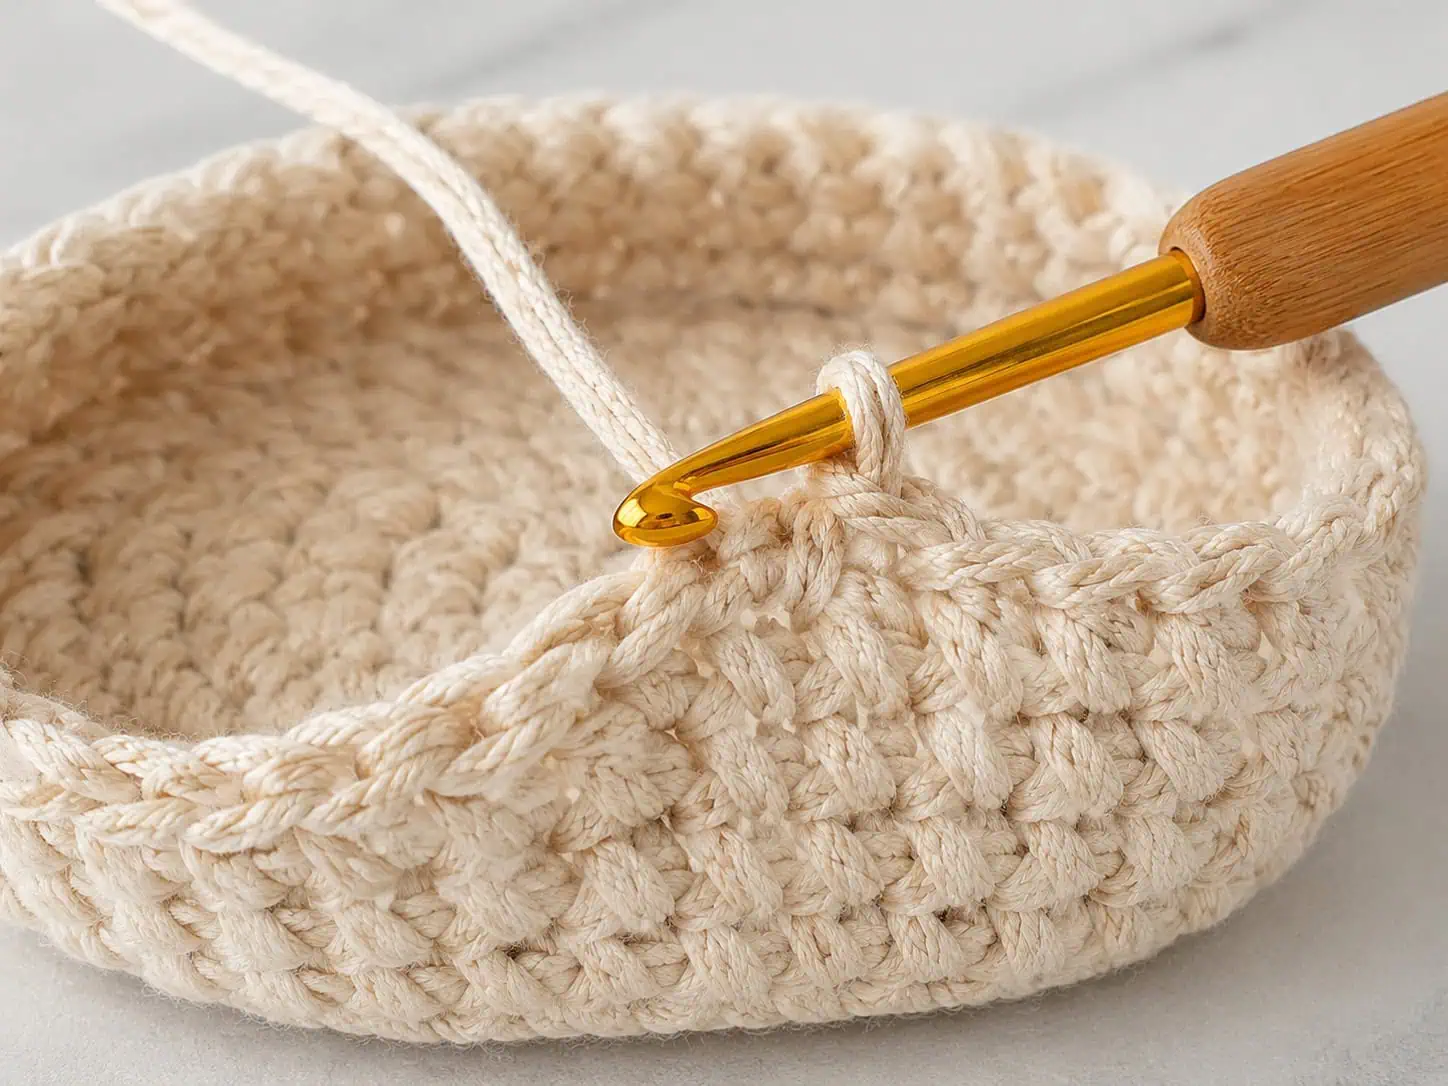
- Mind Your Tension: The secret to a basket that stands up on its own is tight tension. If your fabric feels floppy, drop down to a 7.0 mm or 6.5 mm hook.
- The Magic Ring: Starting with a magic ring ensures there is no hole at the bottom of your basket. Pull the tail tightly after round 2 to secure it.
- Turning the Corner: Round 8 is worked in the Back Loop Only (BLO). This technique creates a crisp, horizontal ridge that helps the basket transition from the flat base to the vertical walls.
Pattern Instructions
Notes
- This basket is worked in joined rounds from the bottom up.
- The chain 1 at the beginning of each round does not count as a stitch.
- Stitch counts are given in bold at the end of each round.
Base
Rnd 1: Make a MR, ch 1, work 6 sc into the ring, pull tail tight to close, join with sl st to first sc. (6 sts)
Rnd 2: Ch 1, 2 sc in each st around, join with sl st to first sc. (12 sts)
Rnd 3: Ch 1, [sc in next st, 2 sc in next st] 6 times, join with sl st to first sc. (18 sts)
Rnd 4: Ch 1, [sc in next 2 sts, 2 sc in next st] 6 times, join with sl st to first sc. (24 sts)
Rnd 5: Ch 1, [sc in next 3 sts, 2 sc in next st] 6 times, join with sl st to first sc. (30 sts)
Rnd 6: Ch 1, [sc in next 4 sts, 2 sc in next st] 6 times, join with sl st to first sc. (36 sts)
Don't lose this article. Enter your email below, and I'll send it to you right now. Plus a little crochet inspiration from me, straight to your inbox.
Rnd 7: Ch 1, [sc in next 5 sts, 2 sc in next st] 6 times, join with sl st to first sc. (42 sts)
Body
Rnd 8: Ch 1, working in BLO, sc in each st around, join with sl st to first sc. (42 sts)
Rnds 9-24: Ch 1, working in both loops, sc in each st around, join with sl st to first sc. (42 sts)
Hanging Loop & Edging
Rnd 25: Ch 1, sc in next 41 sts, ch 12, skip last st, join with sl st to first sc. (53 sts)
Rnd 26: Ch 1, sl st in next 41 sts, work 16 sc into the ch-12 sp, join with sl st to first sl st. (57 sts)
Finishing
Fasten off and cut your yarn, leaving a 6-inch tail. Weave in all ends securely on the inside (wrong side) of the basket. Shape the basket with your hands. If your tension caused the basket to warp slightly, you can lightly steam block it to perfect the cylindrical shape.
Make It Your Own
- Size Adjustments: To make a wider basket, continue the base increase pattern (e.g., [sc in next 6 sts, 2 sc in next st]) until you reach your desired diameter, then proceed to the BLO round.
- Color Blocking: Create a modern dipped look by changing colors at Round 15.
- Leather Accent: Skip the crocheted hanging loop entirely and attach a strip of leather with a brass rivet for a high-end, store-bought look.
Frequently Asked Questions
Can I use acrylic yarn for this basket?
You can, but acrylic tends to be softer and stretchier than cotton. If you use acrylic, hold two strands together and use a smaller hook to force the fabric to be as stiff as possible.
Why is my basket slanting to one side?
Working in joined rounds can sometimes cause a slight seam slant. Ensure you are pulling your slip stitch join very tight, and always place your first single crochet of the new round in the same stitch as the join.
How much weight can this hanging basket hold?
Because the loop is reinforced with 16 single crochet stitches, it is quite sturdy! It can comfortably hold small potted plants, a collection of hand towels, or a few pounds of produce like onions or apples.
I would absolutely love to see your finished hanging baskets! Tag me on Instagram or share your photos in our Facebook community. Happy crocheting!