Hello everyone! Welcome to Day Eight of our Twelve Days of Christmas Crochet countdown! If you haven’t been following along, we’ve already completed four holiday makes – be sure to check them out.
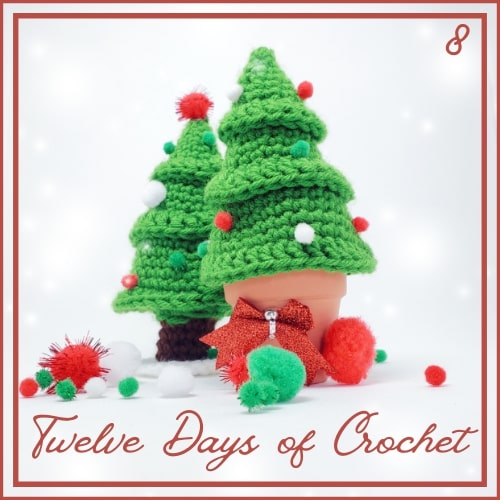
Today’s pattern is a mini holiday tree…
Materials Required
Today’s pattern is an amigurumi pattern, which means you’ll be working in a continuous spiral of single crochet stitches. I recommend using a stitch marker to help you keep track of your rounds.
Here are all of the materials required to make this project – feel free to make substitutions to the yarn colors, weight, and even the hook size.
My project ended up measuring about 5 inches tall. Remember, using a larger hook and yarn of a different weight will affect the finished size of your project!
| 4.50mm crochet hook |
| worsted weight green and brown yarn (white yarn optional for snow) |
| tapestry needle |
| poly-fil stuffing |
| puff balls (optional) |
| 2 inch terracotta pot (optional) |
| hot glue gun (optional) |
| sparkly bow (optional) |
Abbreviations
Here are all of my standard abbreviations. Note: Some of these may not be used in the pattern – these are the stitches that I use most frequently! If you see an abbreviation that you are unfamiliar with, please refer back to this chart.
Note: For this project, increases and decreases are single crochet increases/ decreases unless otherwise specified! (This is generally the standard in amigurumi projects.)
| ML | magic loop |
| R | row/round |
| st | stitch |
| slp st | slip stitch |
| ch | chain |
| sc | single crochet |
| BLOsc | back loop only single crochet |
| BLOdec | back loop only decrease |
| inc | increase |
| dec | decrease |
| dc | double crochet |
| ** | repeat |
| () | number of sts in row |
Tree
In green (or whatever color you chose to make your tree in), ML 3
R1: inc in each st (6)
R2: *sc, inc* around (9)
R3: sc around (9)
R4: *2sc, inc* around (12)
R5: sc around (12)
R6: *3sc, inc* around (15)
R7: BLOsc around (15)
R8: *4sc, inc* around (18)
R9: sc around (18)
R10: *5sc, inc* around (21)
R11: sc around (21)
R12: *6sc, inc* around (24)
R13: BLOsc around (24)
R14: *7sc, inc* around (27)
R15: sc around (27)
R16: *8sc, inc* around (30)
R17: sc around (30)
R18: *9sc, inc* around (33)
R19: *10sc, inc* around (36)
R20: *4BLOsc, BLOdec* around (30)
R21: *3sc, dec* around (24)
R22: *2sc, dec* around (18)
R23: *sc, dec* around (12)
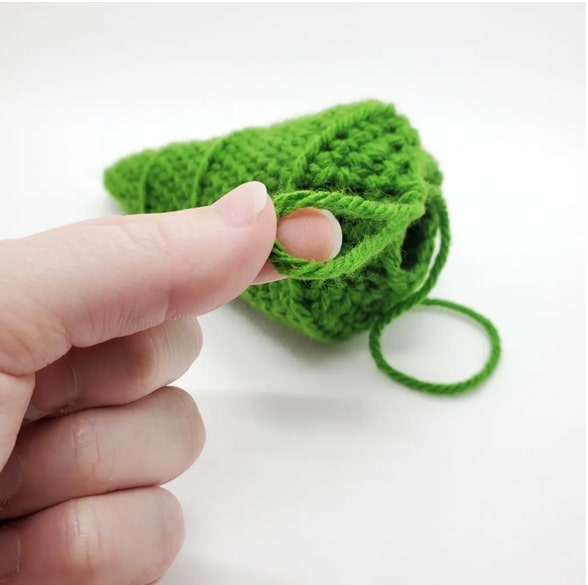
Cut the green yarn, pulling the last stitch very long and leaving a little tail. We’re going to come back to add the stump, but I find it’s easier to add the “swoops” of the tree on an unstuffed body.
Swoops/ Branches
Attach your green yarn to the first row of BLO loops at the top of the tree.
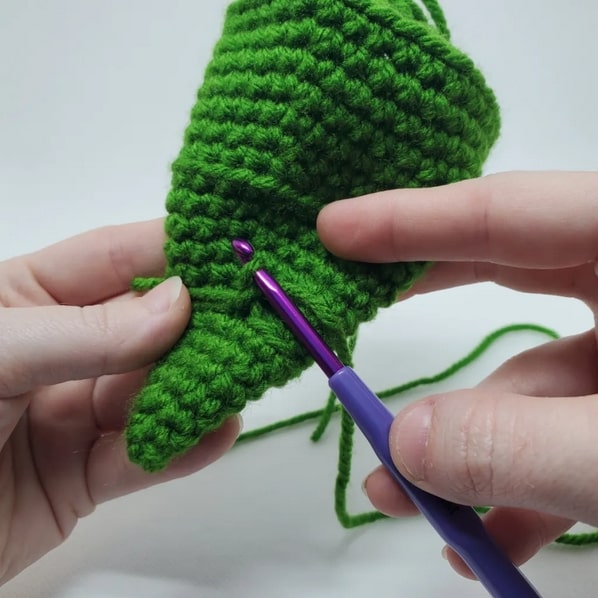
Once you’ve attached, ch 2. Then, work this pattern around the BLO row:
3dc, dc inc, *4dc, dc inc* [repeat * * twice]
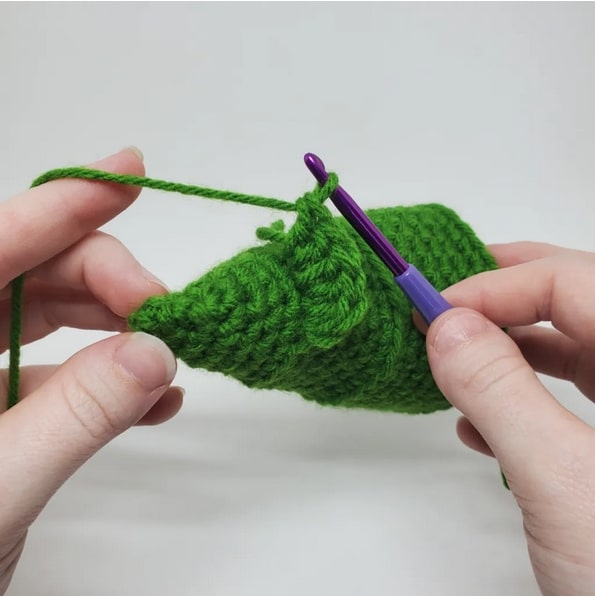
This row will take you all the way around the top of the tree. Slp st to the top of the ch 2 to close, then weave in your tail.
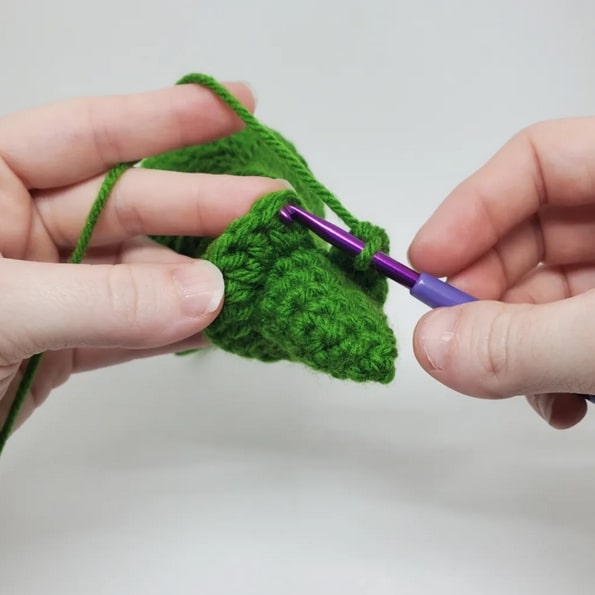
Now we’ll do something very similar in the next BLO row (the one in the middle of the tree). Just like before, attach your yarn to one of the BLO stitches. Ch 2, then follow this pattern around:
6dc, dc increase *7dc, dc increase* [repeat * * twice]
This will take you all the way around the second BLO row. Just like before, slp st to close and weave in your tail.
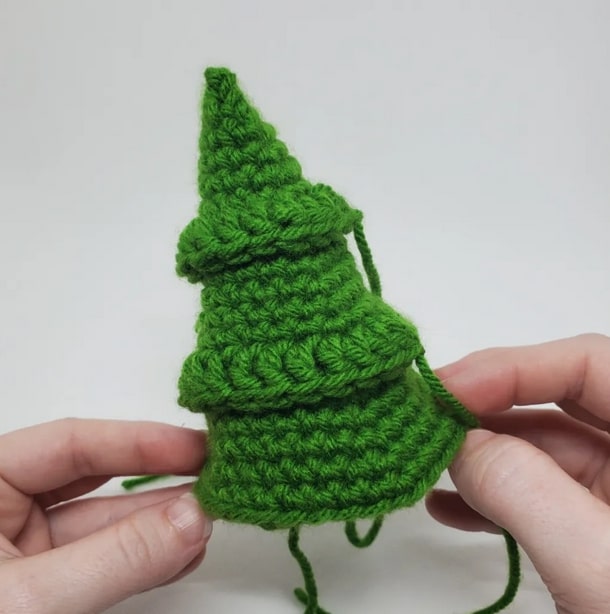
Before we complete the last swoop, stuff the tree. Focus the majority of stuffing towards the point, and less towards the bottom of the tree. If you over stuff, the tree loses some of the pointy shape we’re going for.
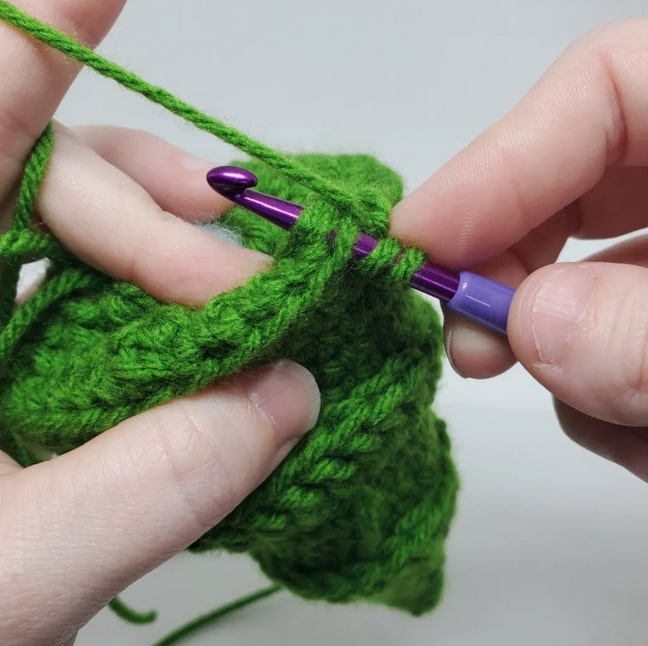
For the last BLO row, we need to do something slightly different than the prior rows. We’ll be working through both the BLO row and the sc row just below it. This really helps the tree hold its shape!
Just as before, attach your yarn in one of the BLO sts at the bottom of the tree, then ch 2. Then, working in both the BLO st and through the sts in R21, dc all the way around. Slp st to the top of the ch 2 to close, then weave in the tail.

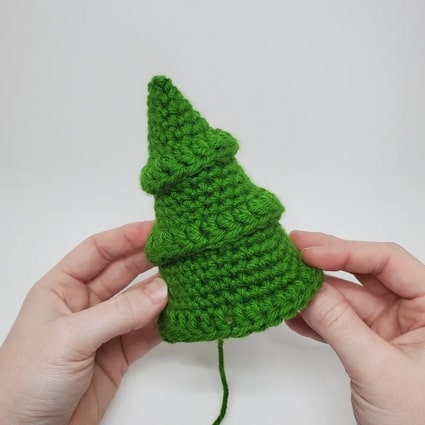
If you’re planning on setting this into a tiny terracotta pot, then you’re done here – no need to make a trunk! You can tie off the green and set the top of the tree directly onto the terracotta pot. I glue mine with hot glue to the very top of the pot.
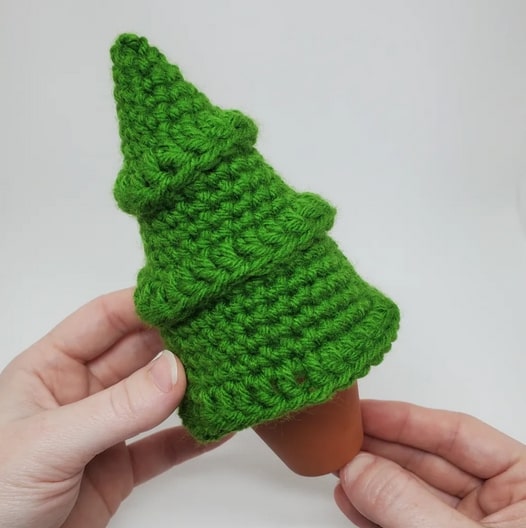
If you’re making the trunk, pull the long loop we left before adding the swoops back to a normal stitch size and attach brown yarn here.
R24: BLO sc around (12)
R25 – R27: sc around
Stuff the trunk here!
R28: BLO sc dec in all sts (6)
Cut yarn and slp st to close. Sew through each of the remaining sts (not the loops made by the BLO – these are there to help flatten out the trunk of the tree) and pull tight to cinch closed. Tie a knot, then weave in the end.
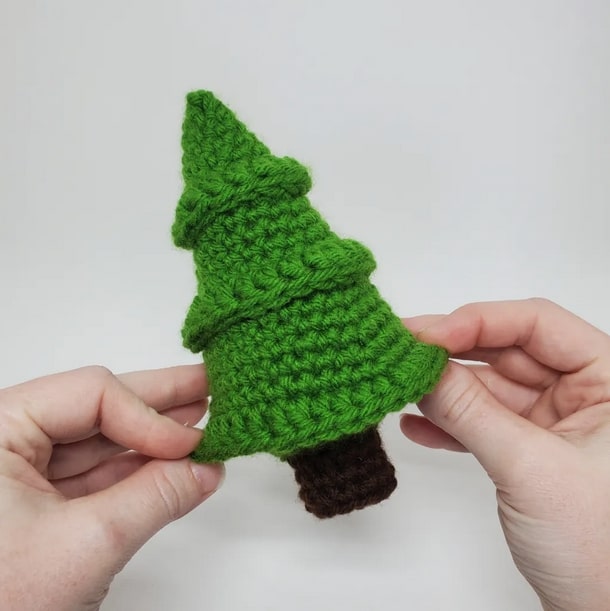
Tree finished! However, you may have noticed the little dude is a tad unstable. If you’d like your tree to stand up, you can make a snowy “coin” to help support him. You can skip this step if you wish and be on your way with your little baby tree!
Snowy Coin for Support (optional)
With white yarn, ML6
R1: inc in each st (12)
R2: *sc, inc* (18)
R2: *2sc, inc* (24)
R3: *3sc, inc* (30)
Slp st to close, then leave a long tail. Use that tail to sew the tree to the center of the circle we just made.

Now it’s time for the fun part: Pom poms! Using your hot glue gun, attach whatever decorations you’d like to your tree!
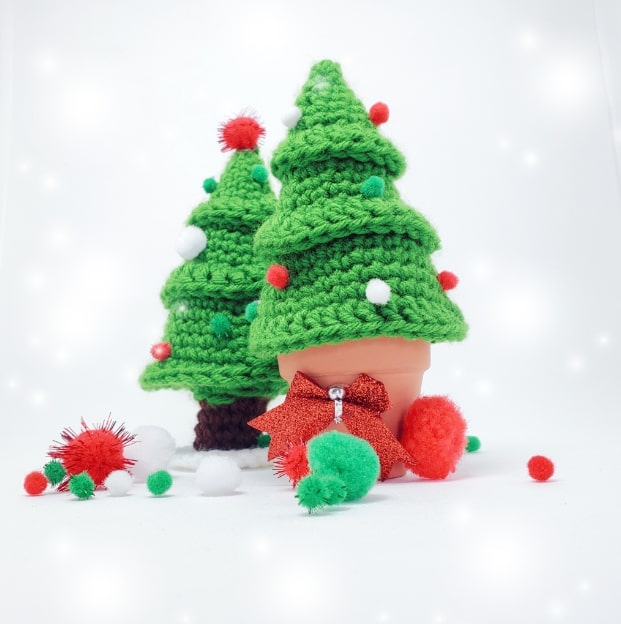
Complete!

